Introduction to Image Preview in Main Window
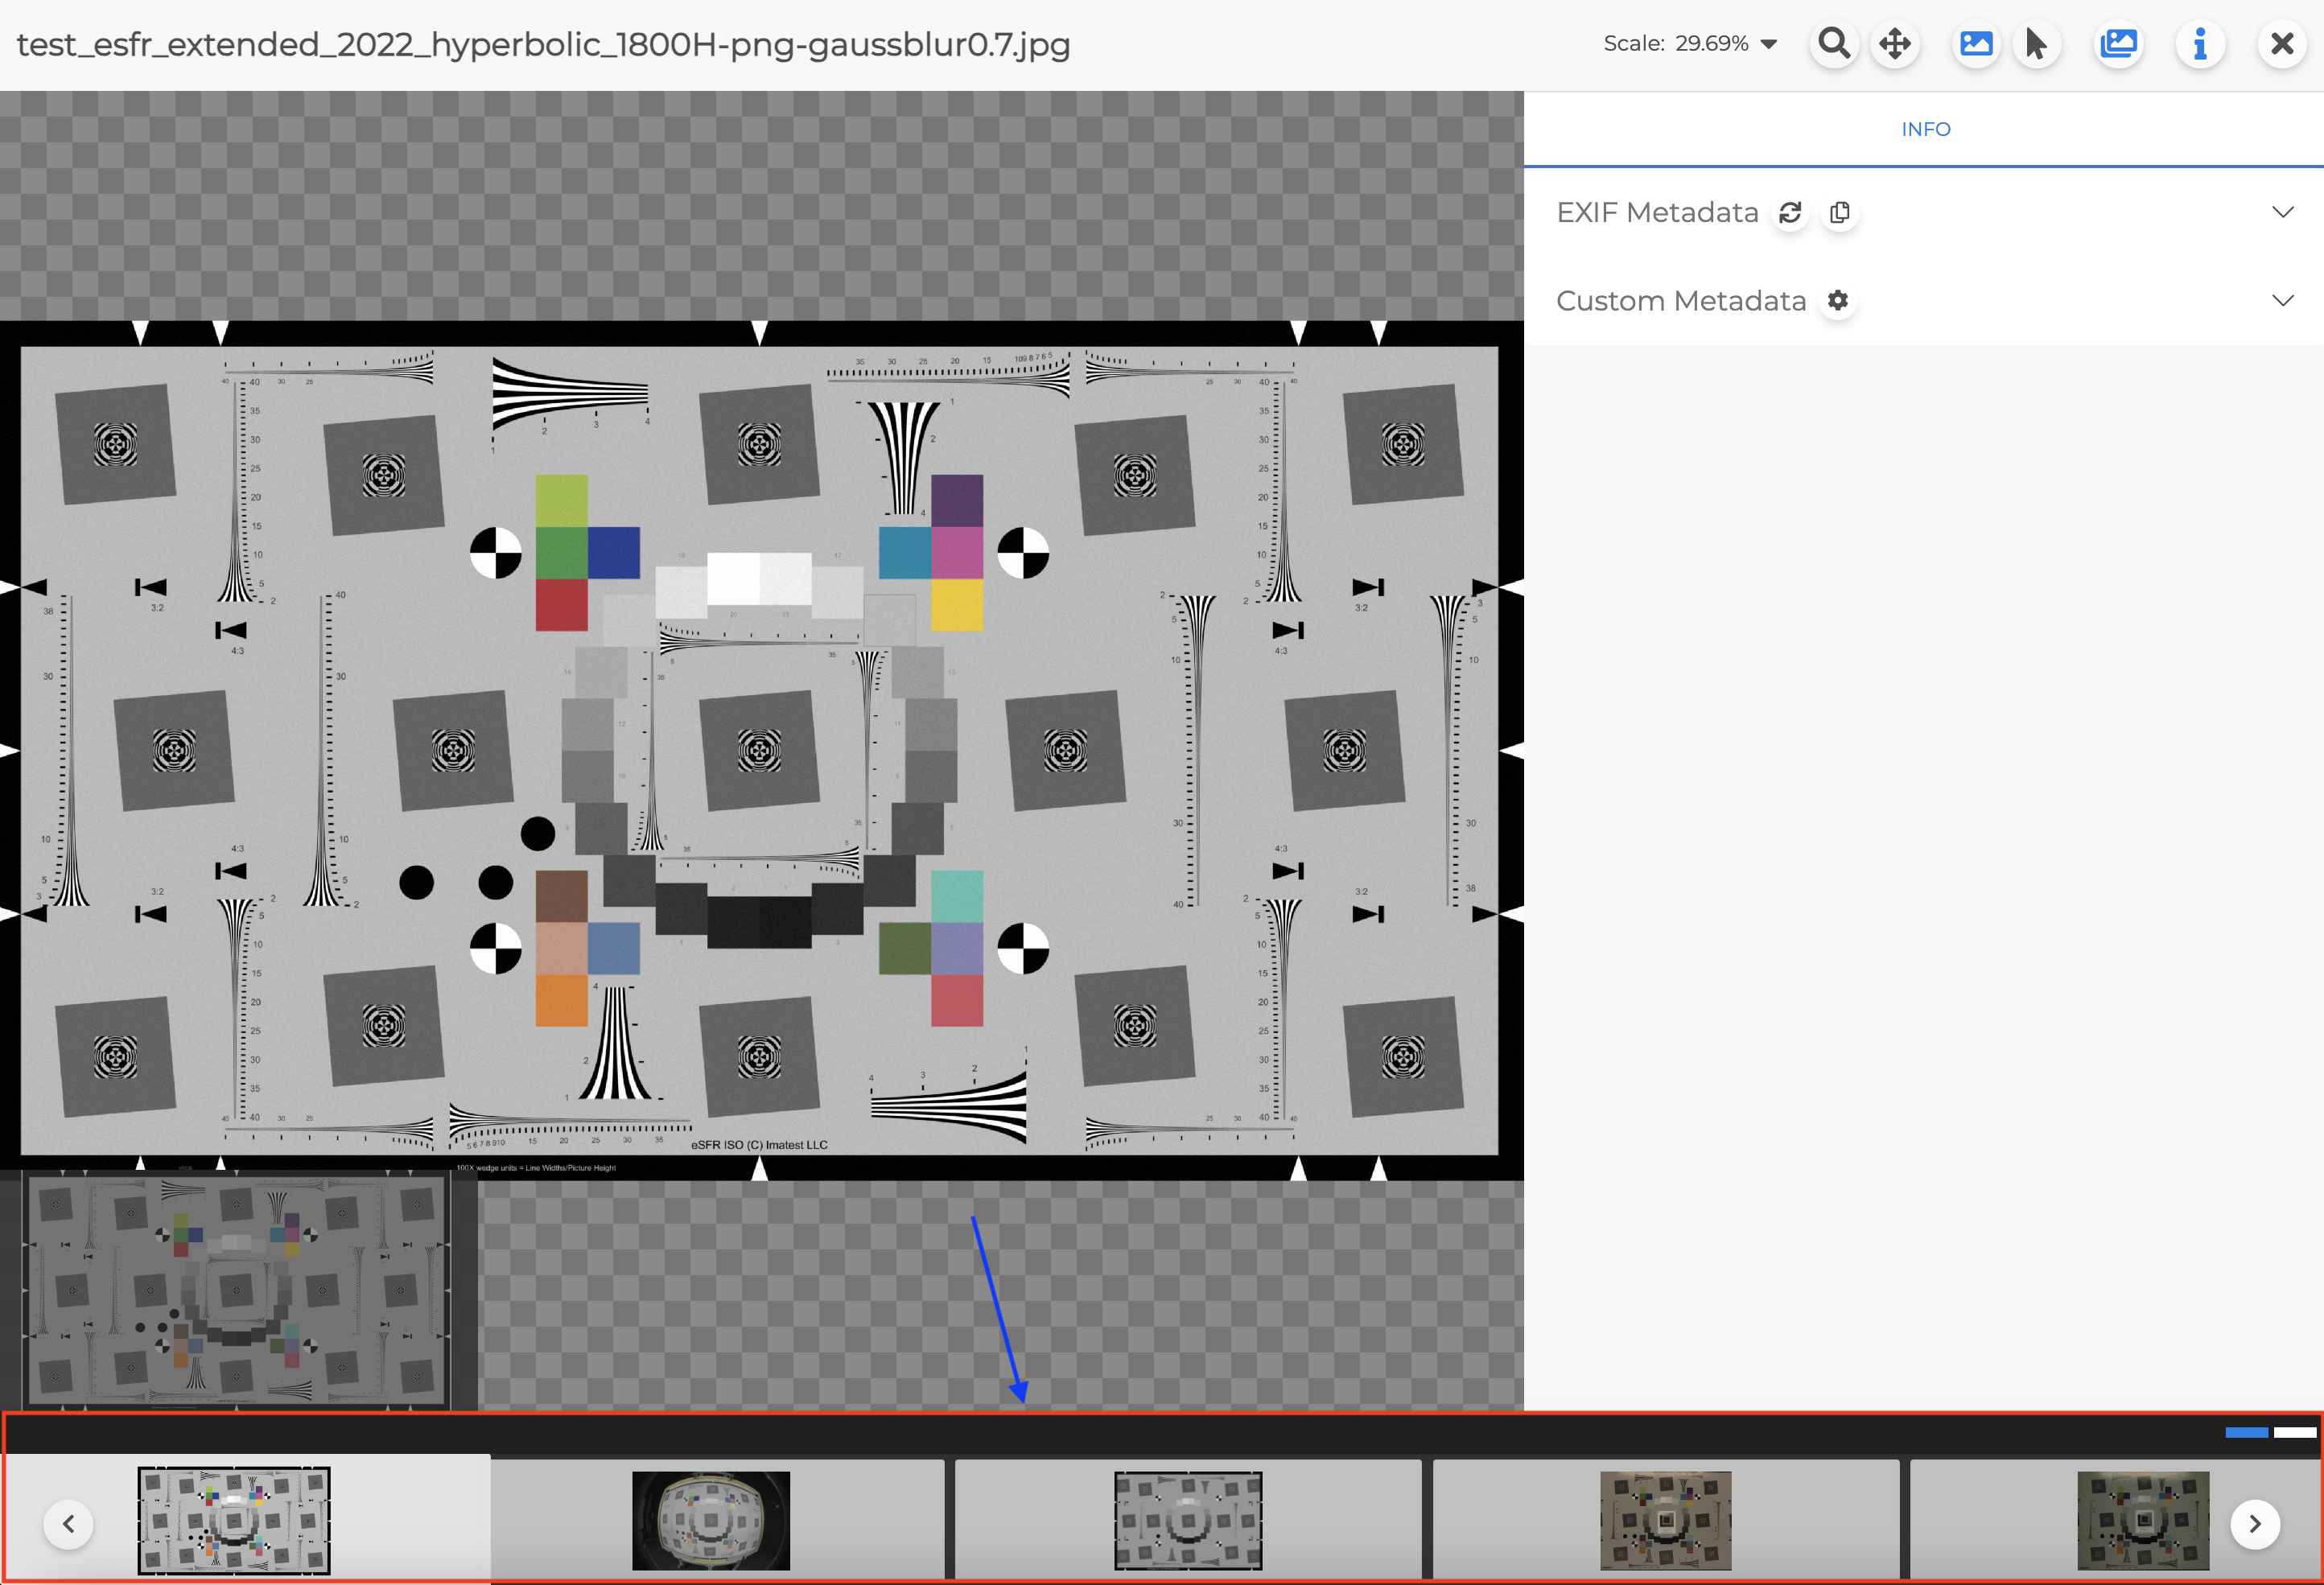
To go to Single Image Preview, click on Eye Icon on the uploaded image in the Main Window.
![]()
|
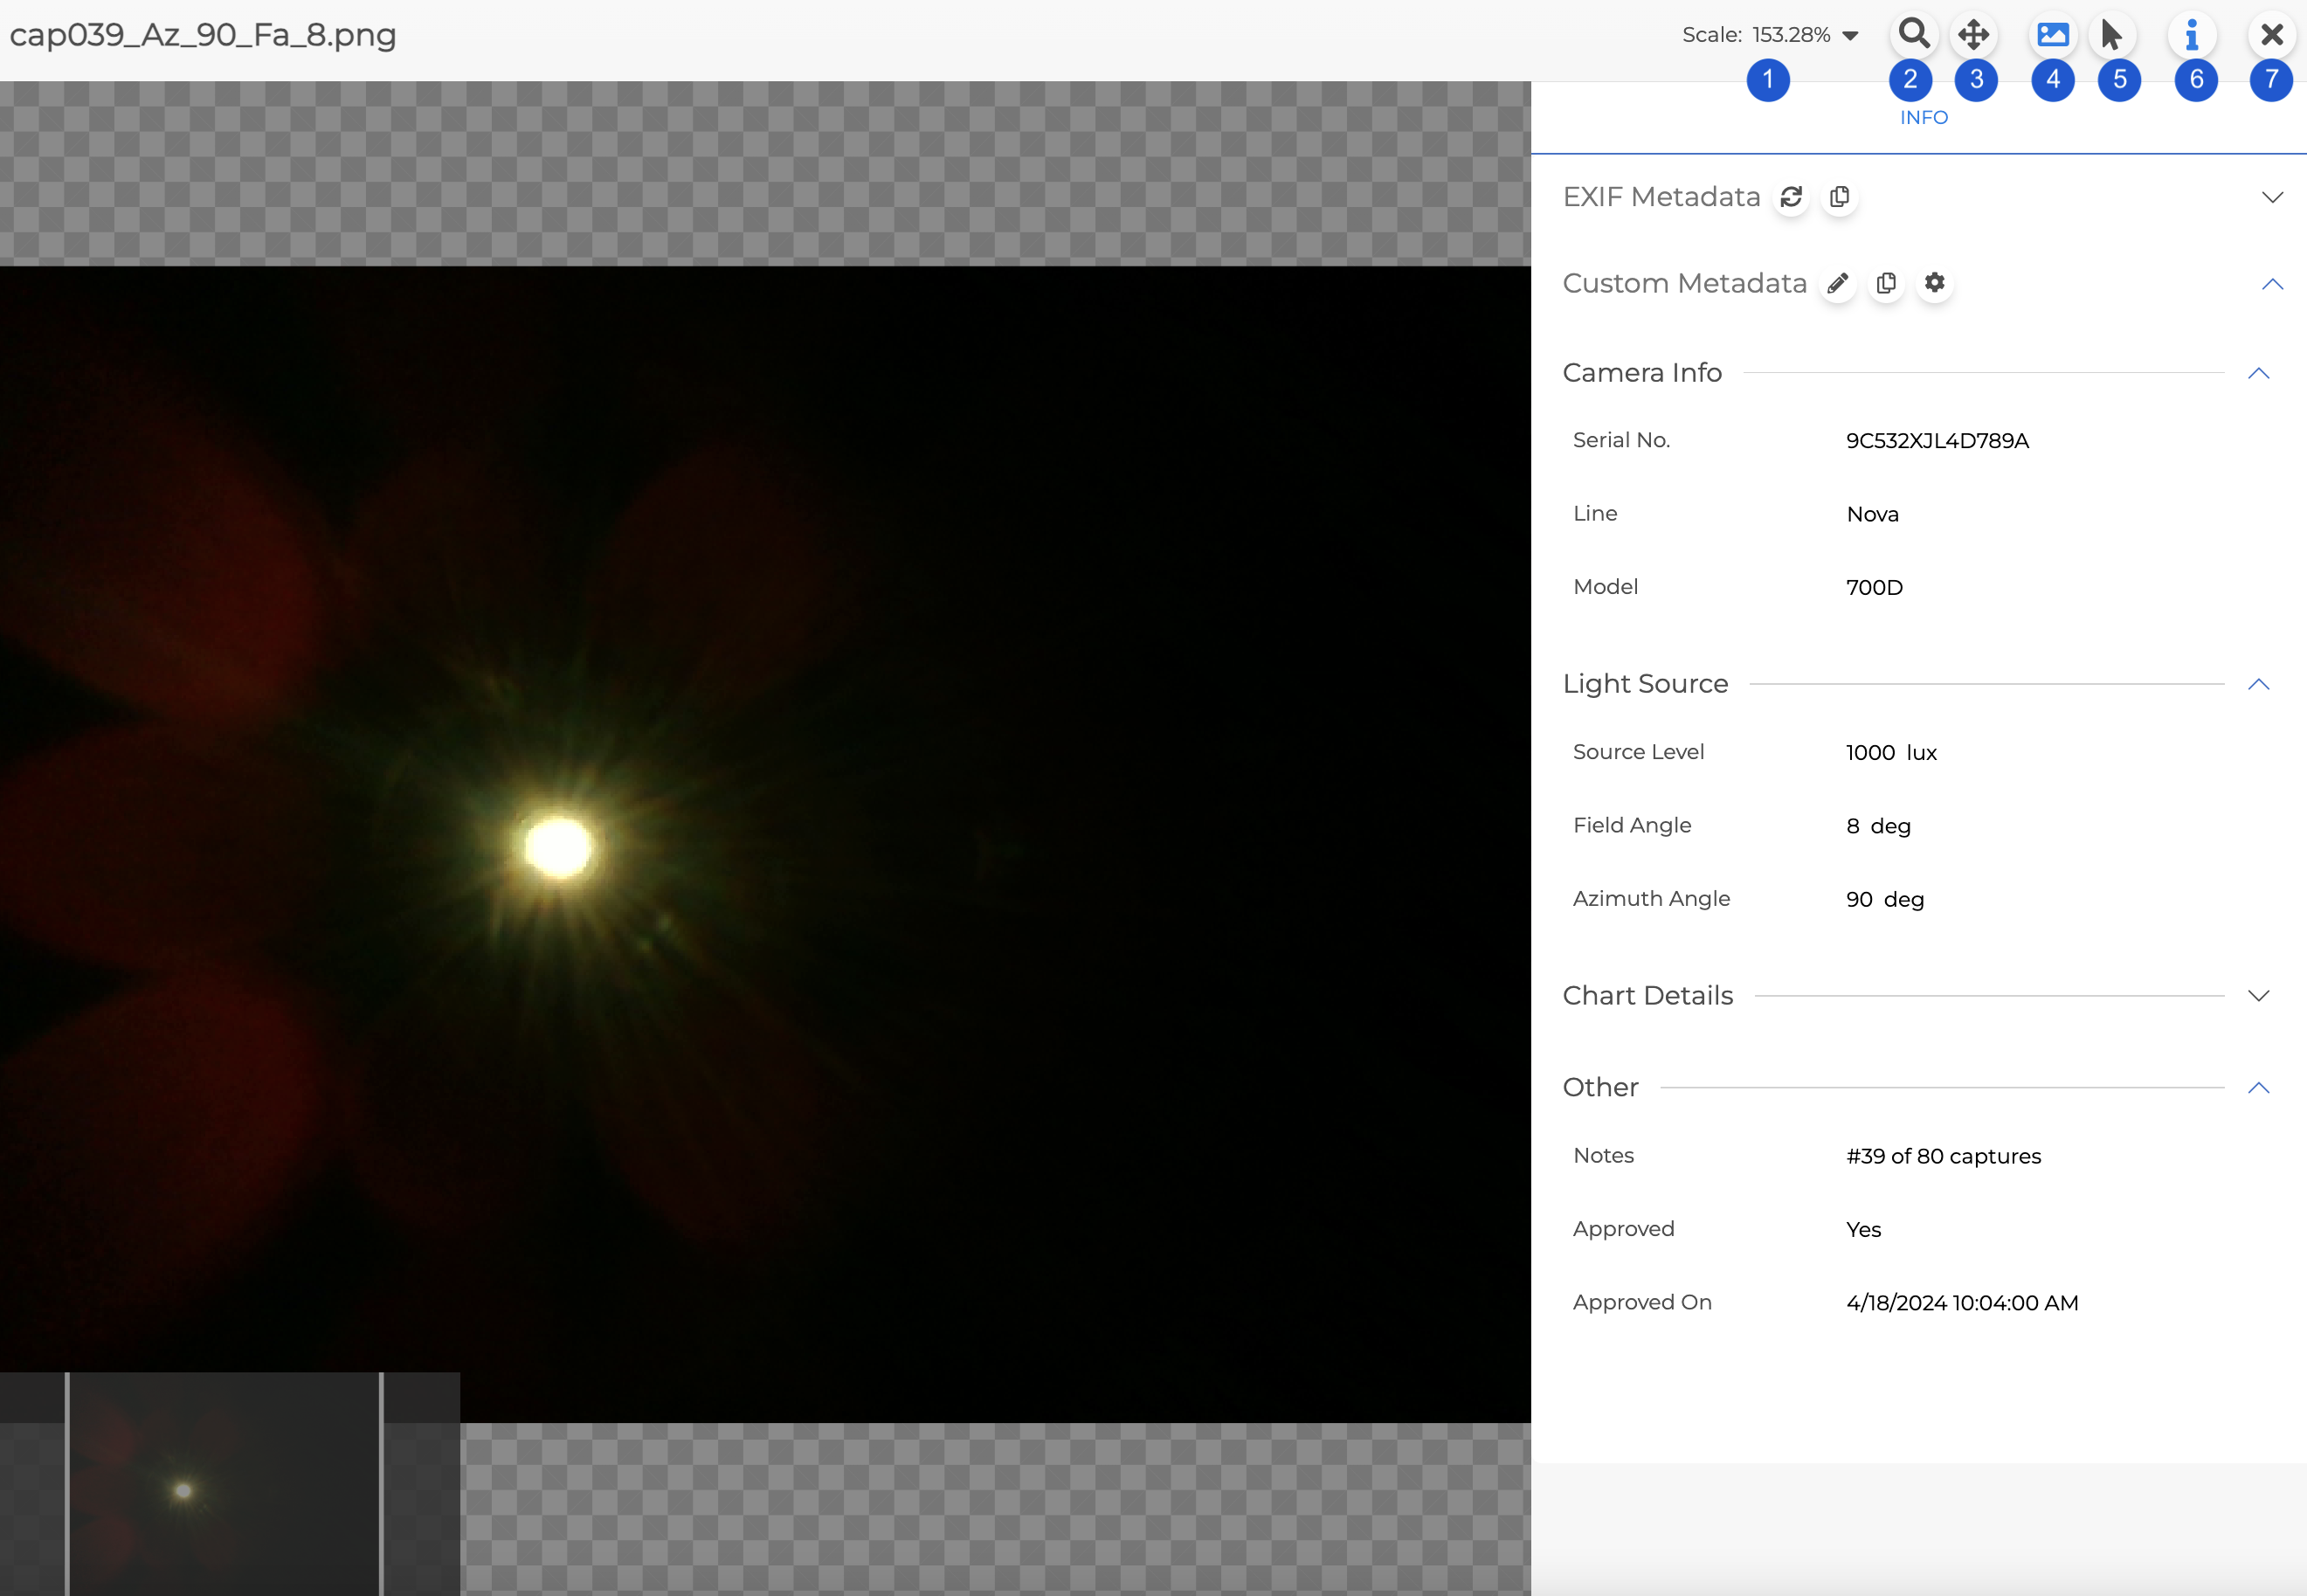
1 |
Zoom Scale |
To change to a specific zoom scale, double click on the number to display the input box. Once the number has been entered, click Enter to set the zoom. | |
|
2 |
Zoom Mode |
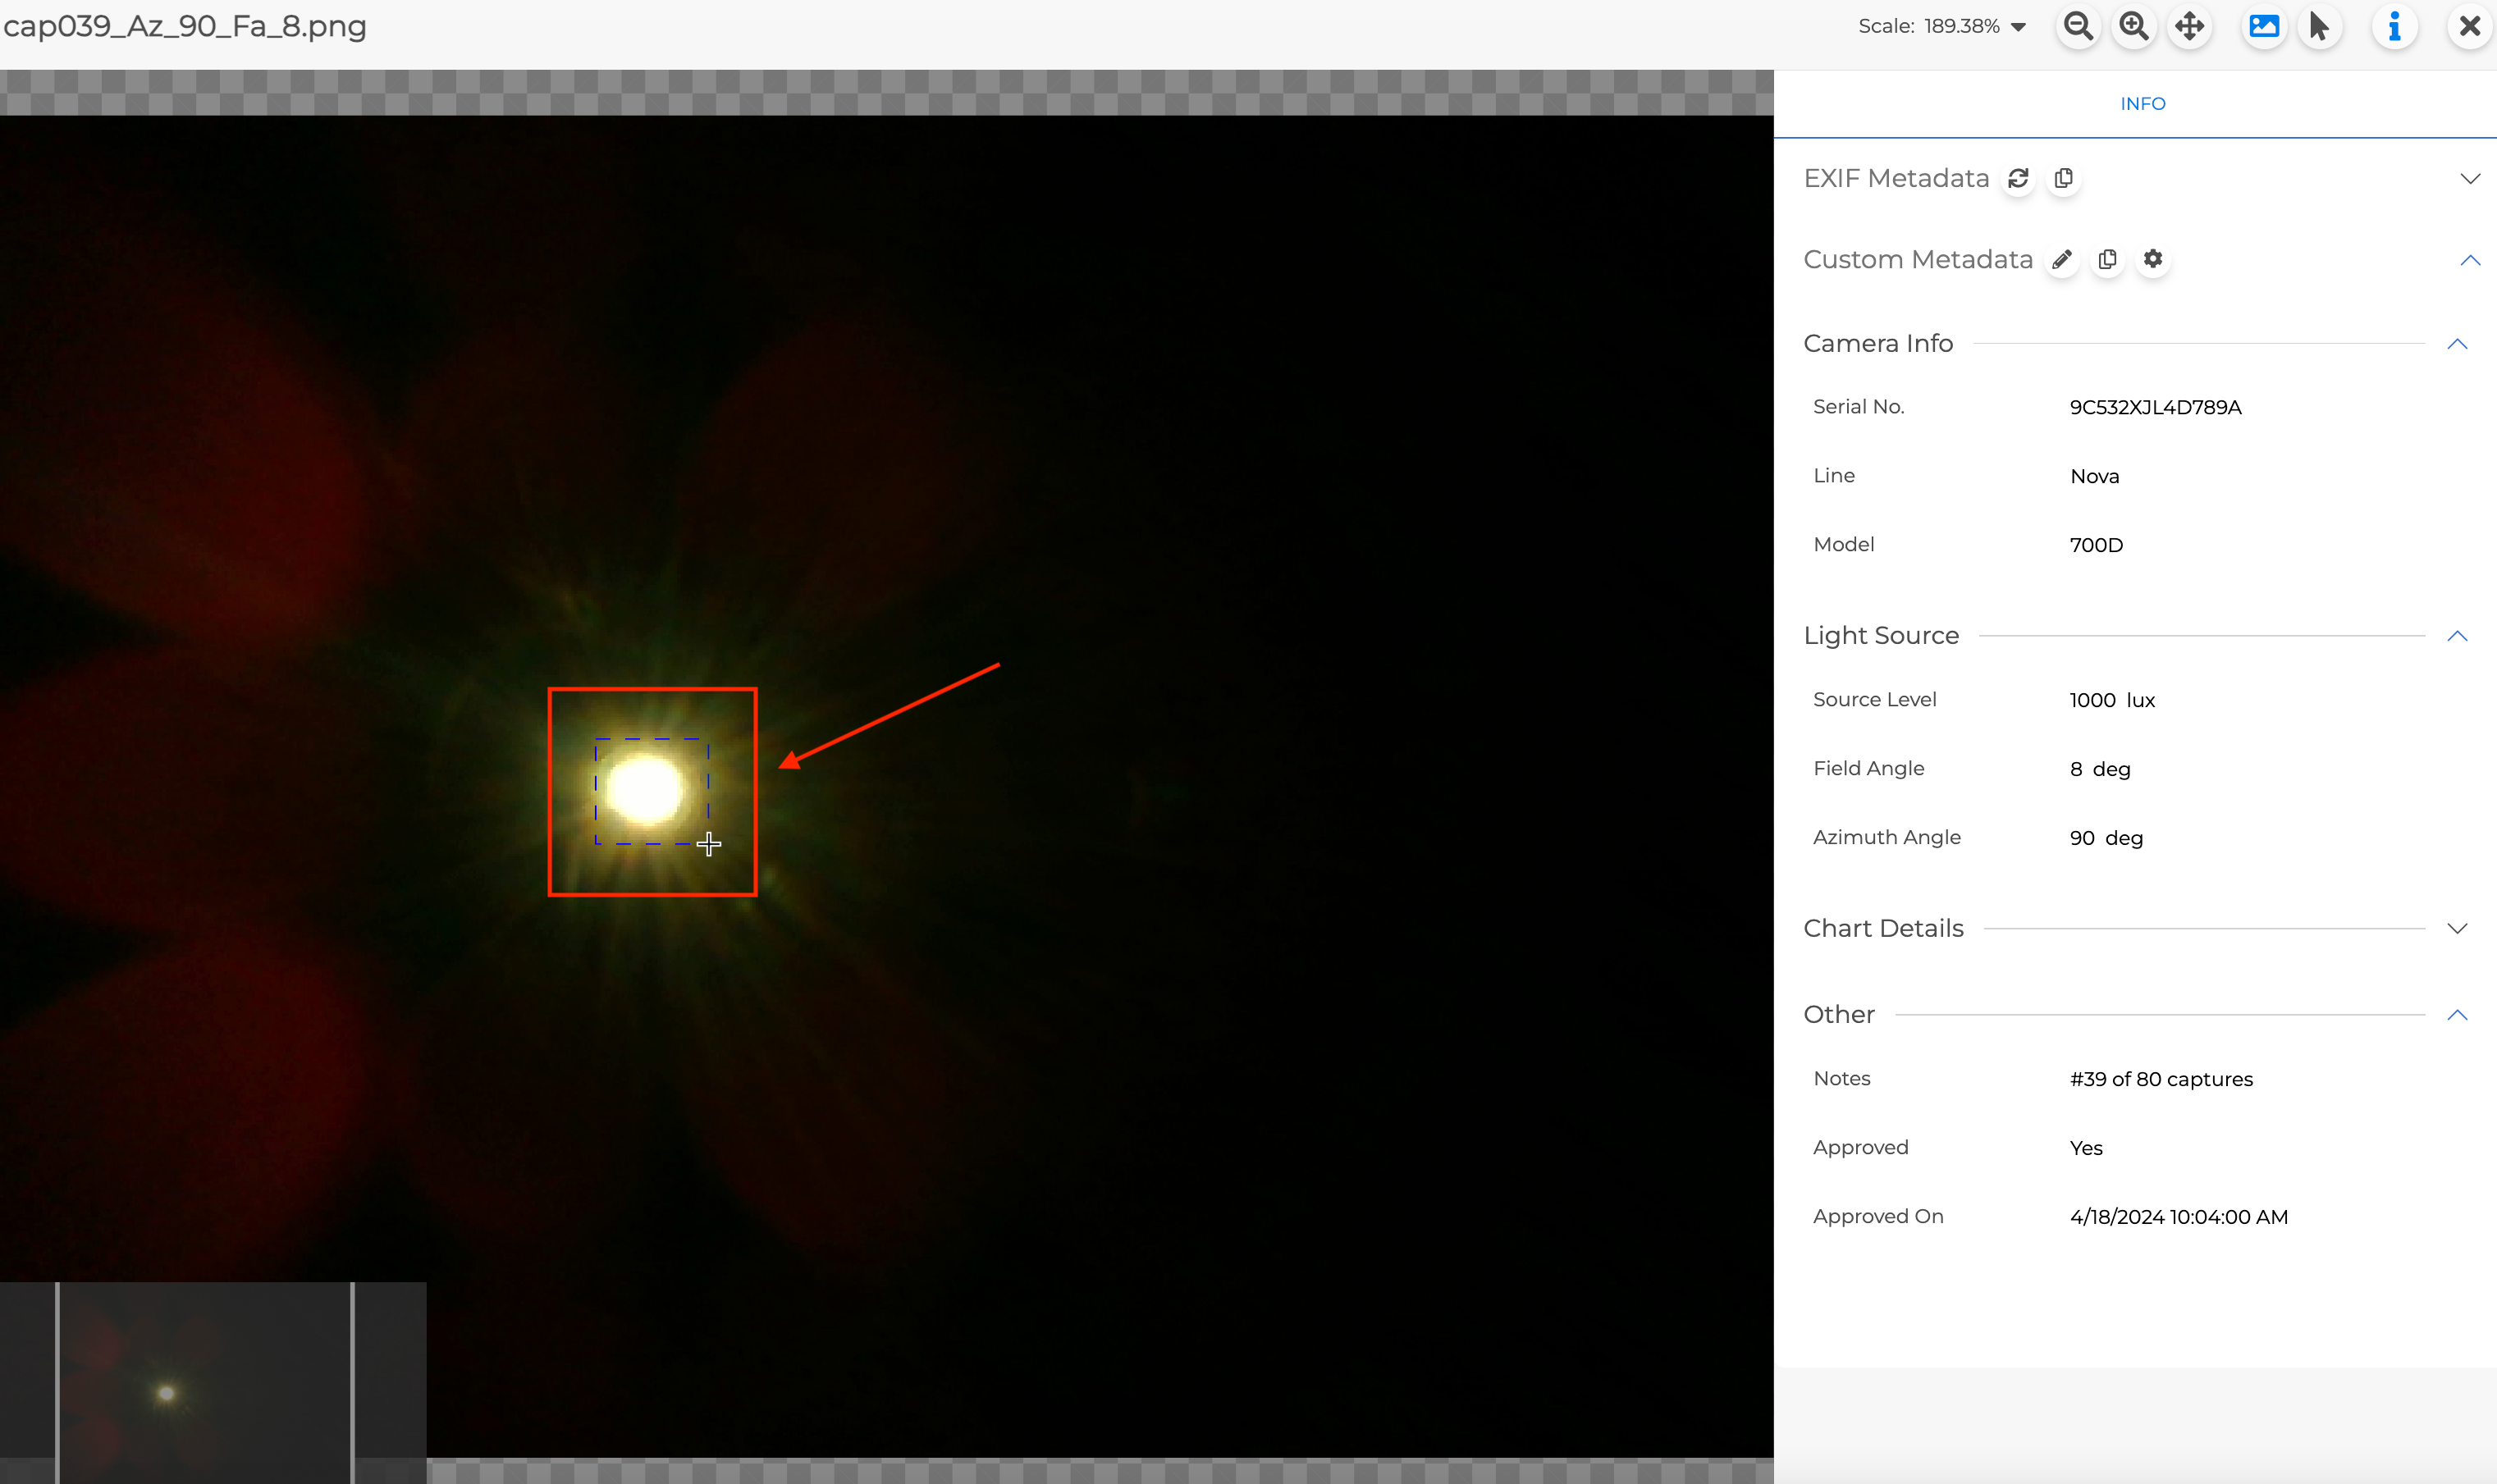
When the zoom icon has been clicked, two zoom icons (“Zoom Out” and “Zoom In“) will appear and those buttons can be clicked to zoom out of the image and zoom in into the image respectively. After clicking on that zoom icon, the cursor on the image will change to “crosshair“. This allows for zooming in into a specific feature of the image by clicking and dragging and releasing the mouse to set the zoom. Scroll wheel can also be used to zoom in and out of the image. |
|
|
3 |
Pan Mode |
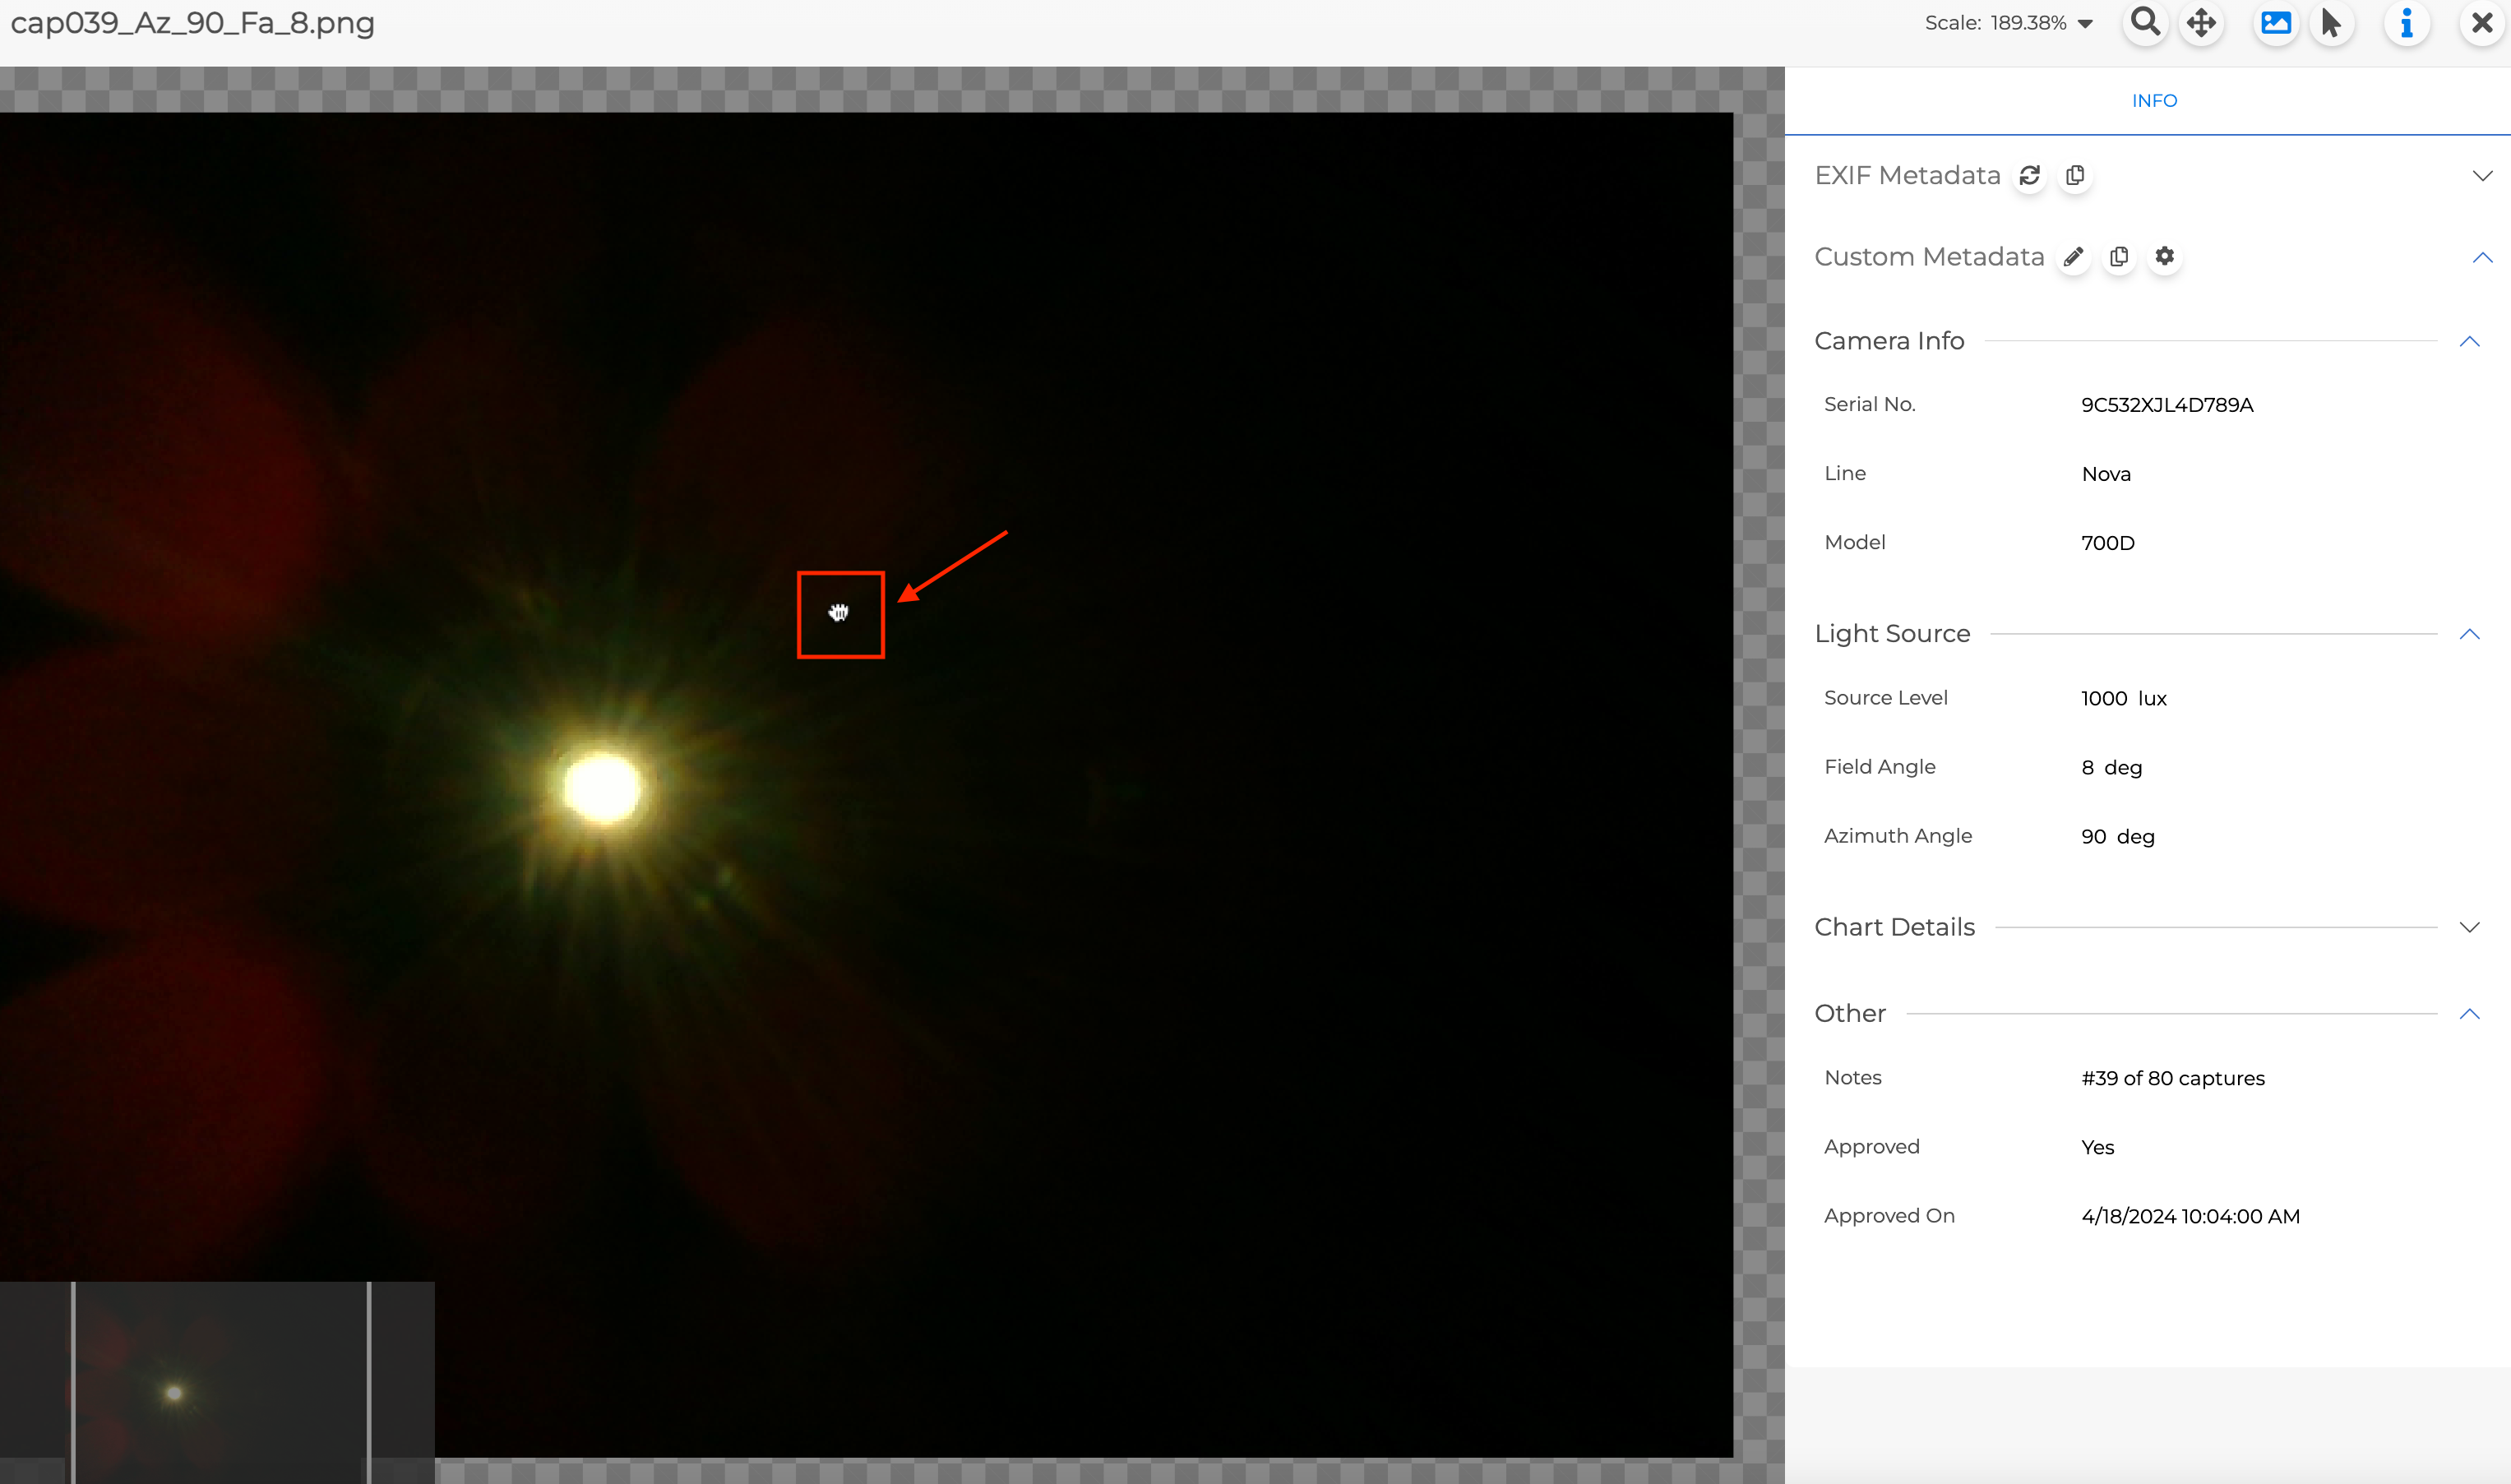
When the pan icon has been clicked, the cursor on the image will change to “grab“. Once in pan mode, use the mouse to click and drag to move the image. |
|
|
4 |
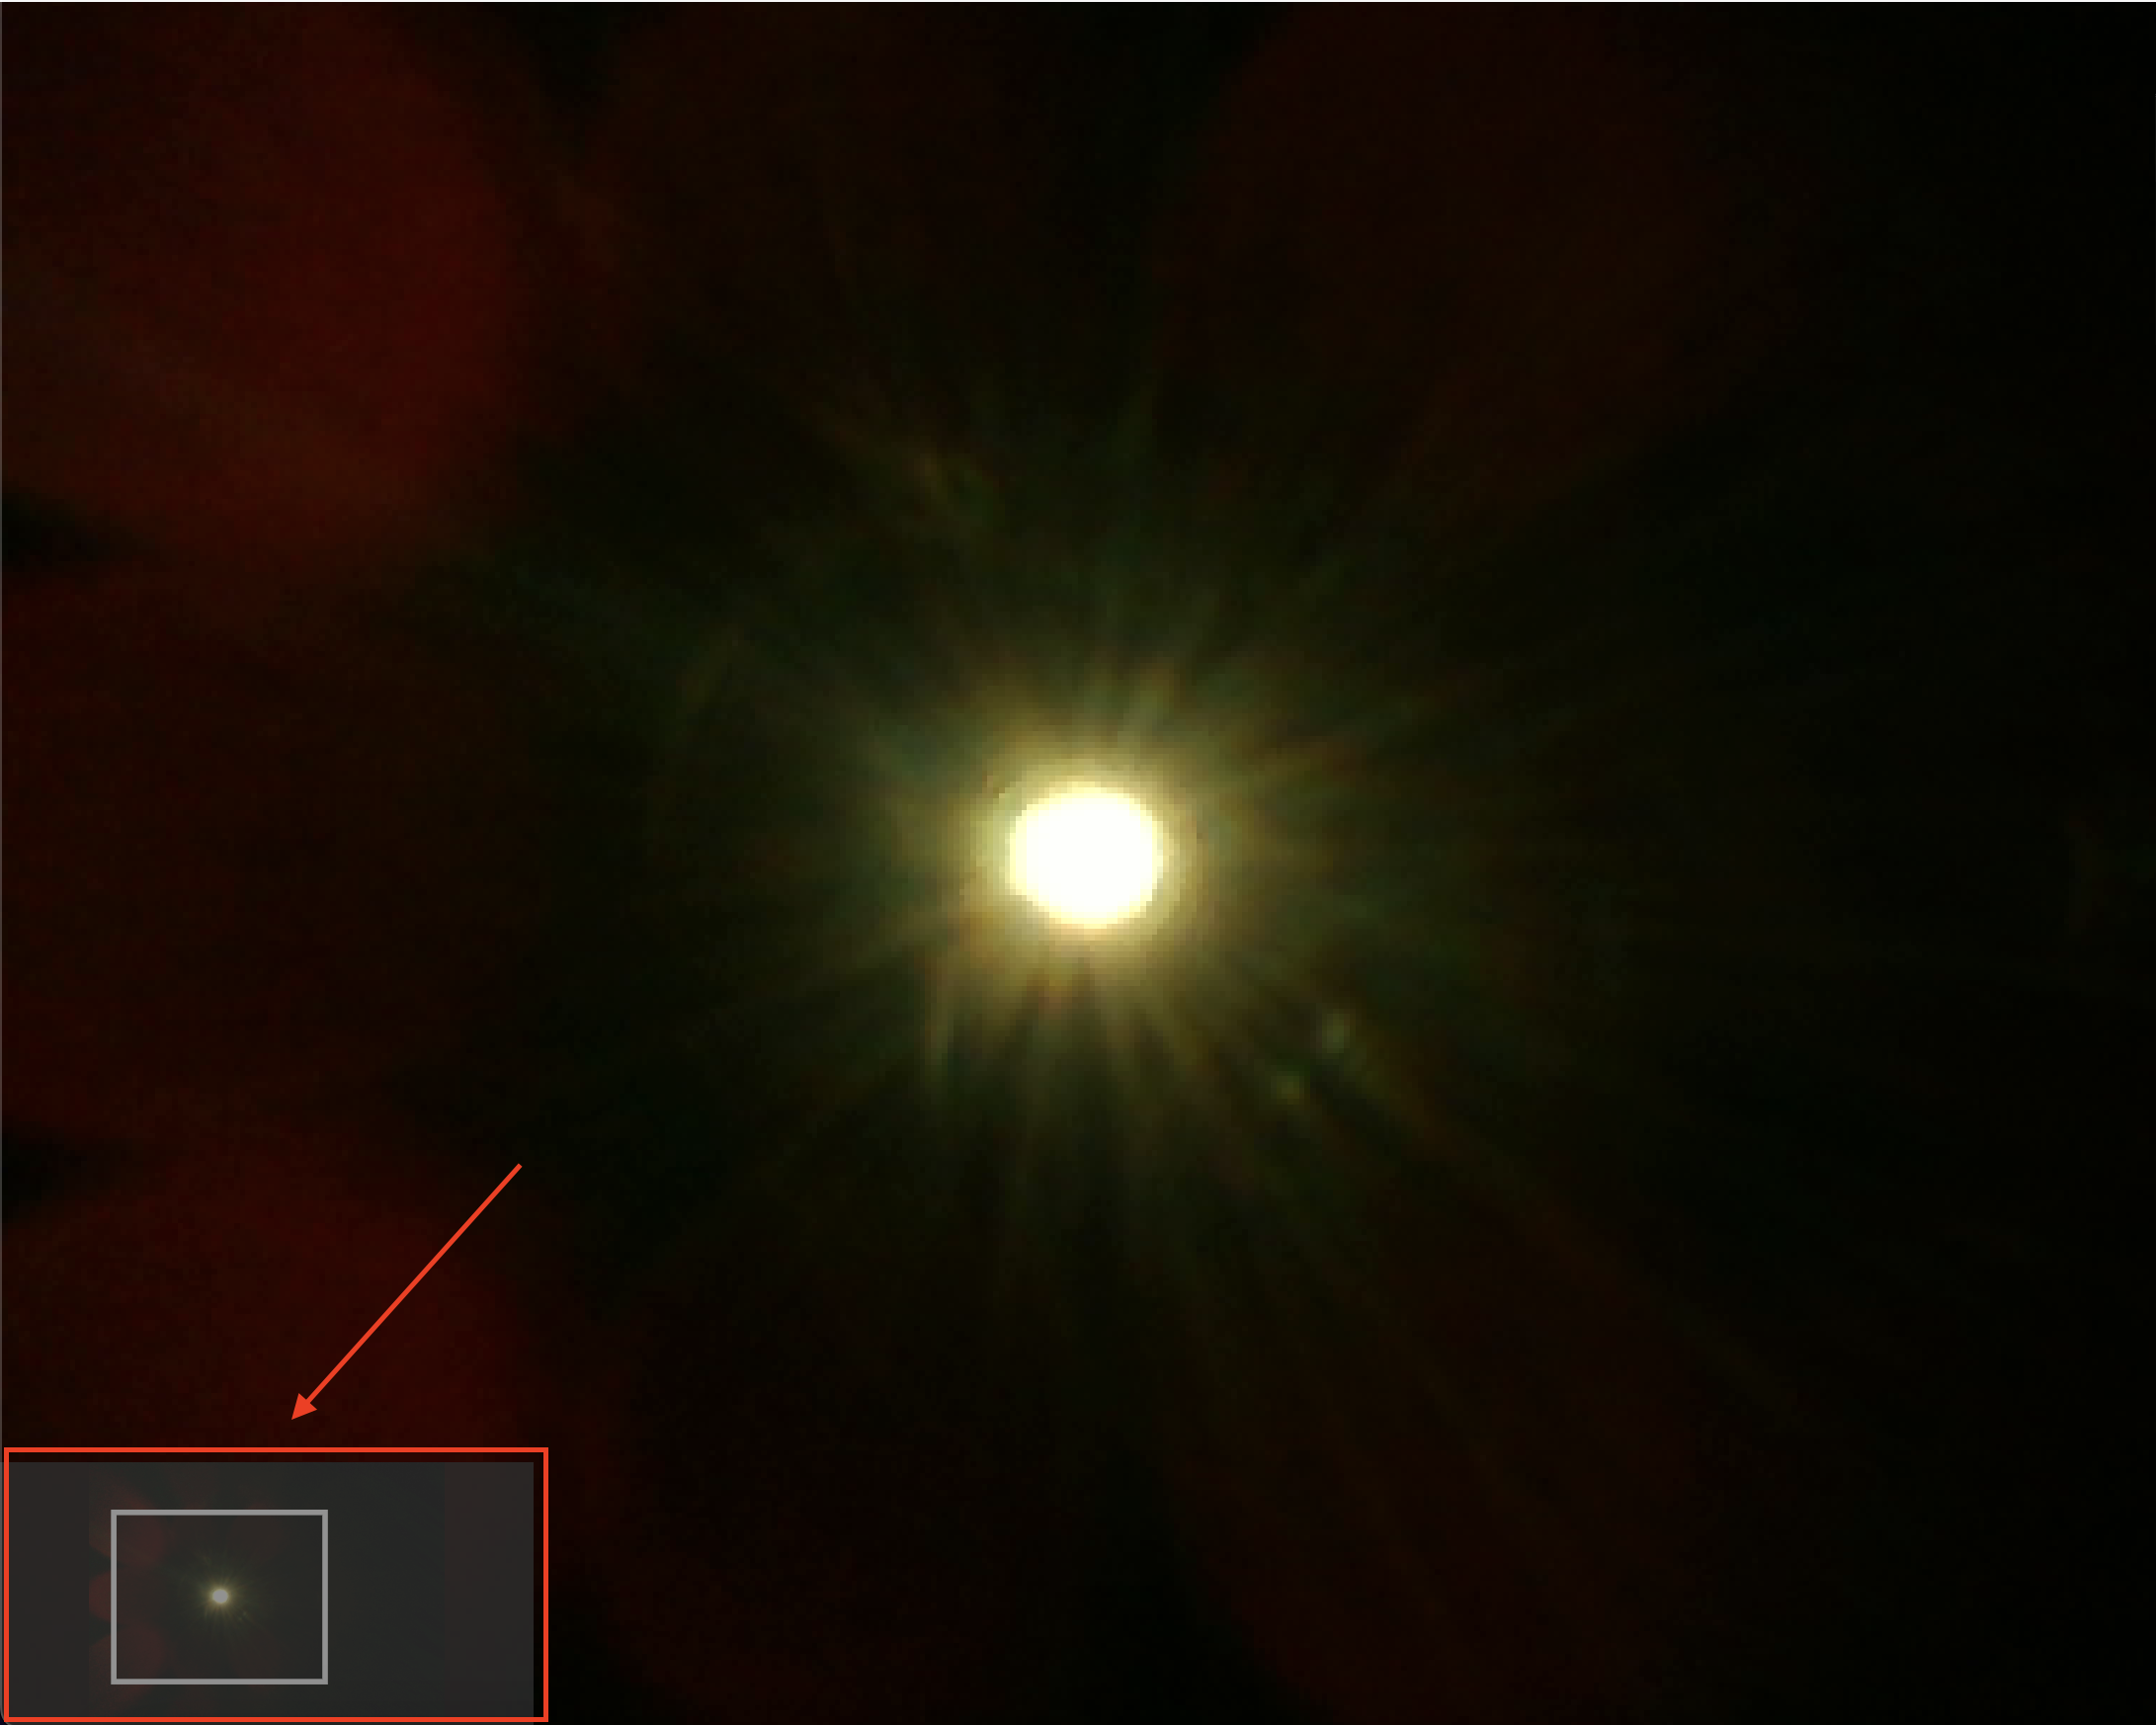
Mini-map |
Mini-map shows the whole image including the current focus on the main image to know the position of the main image especially when the image has been zoomed in and has been moved. |
 |
|
5 |
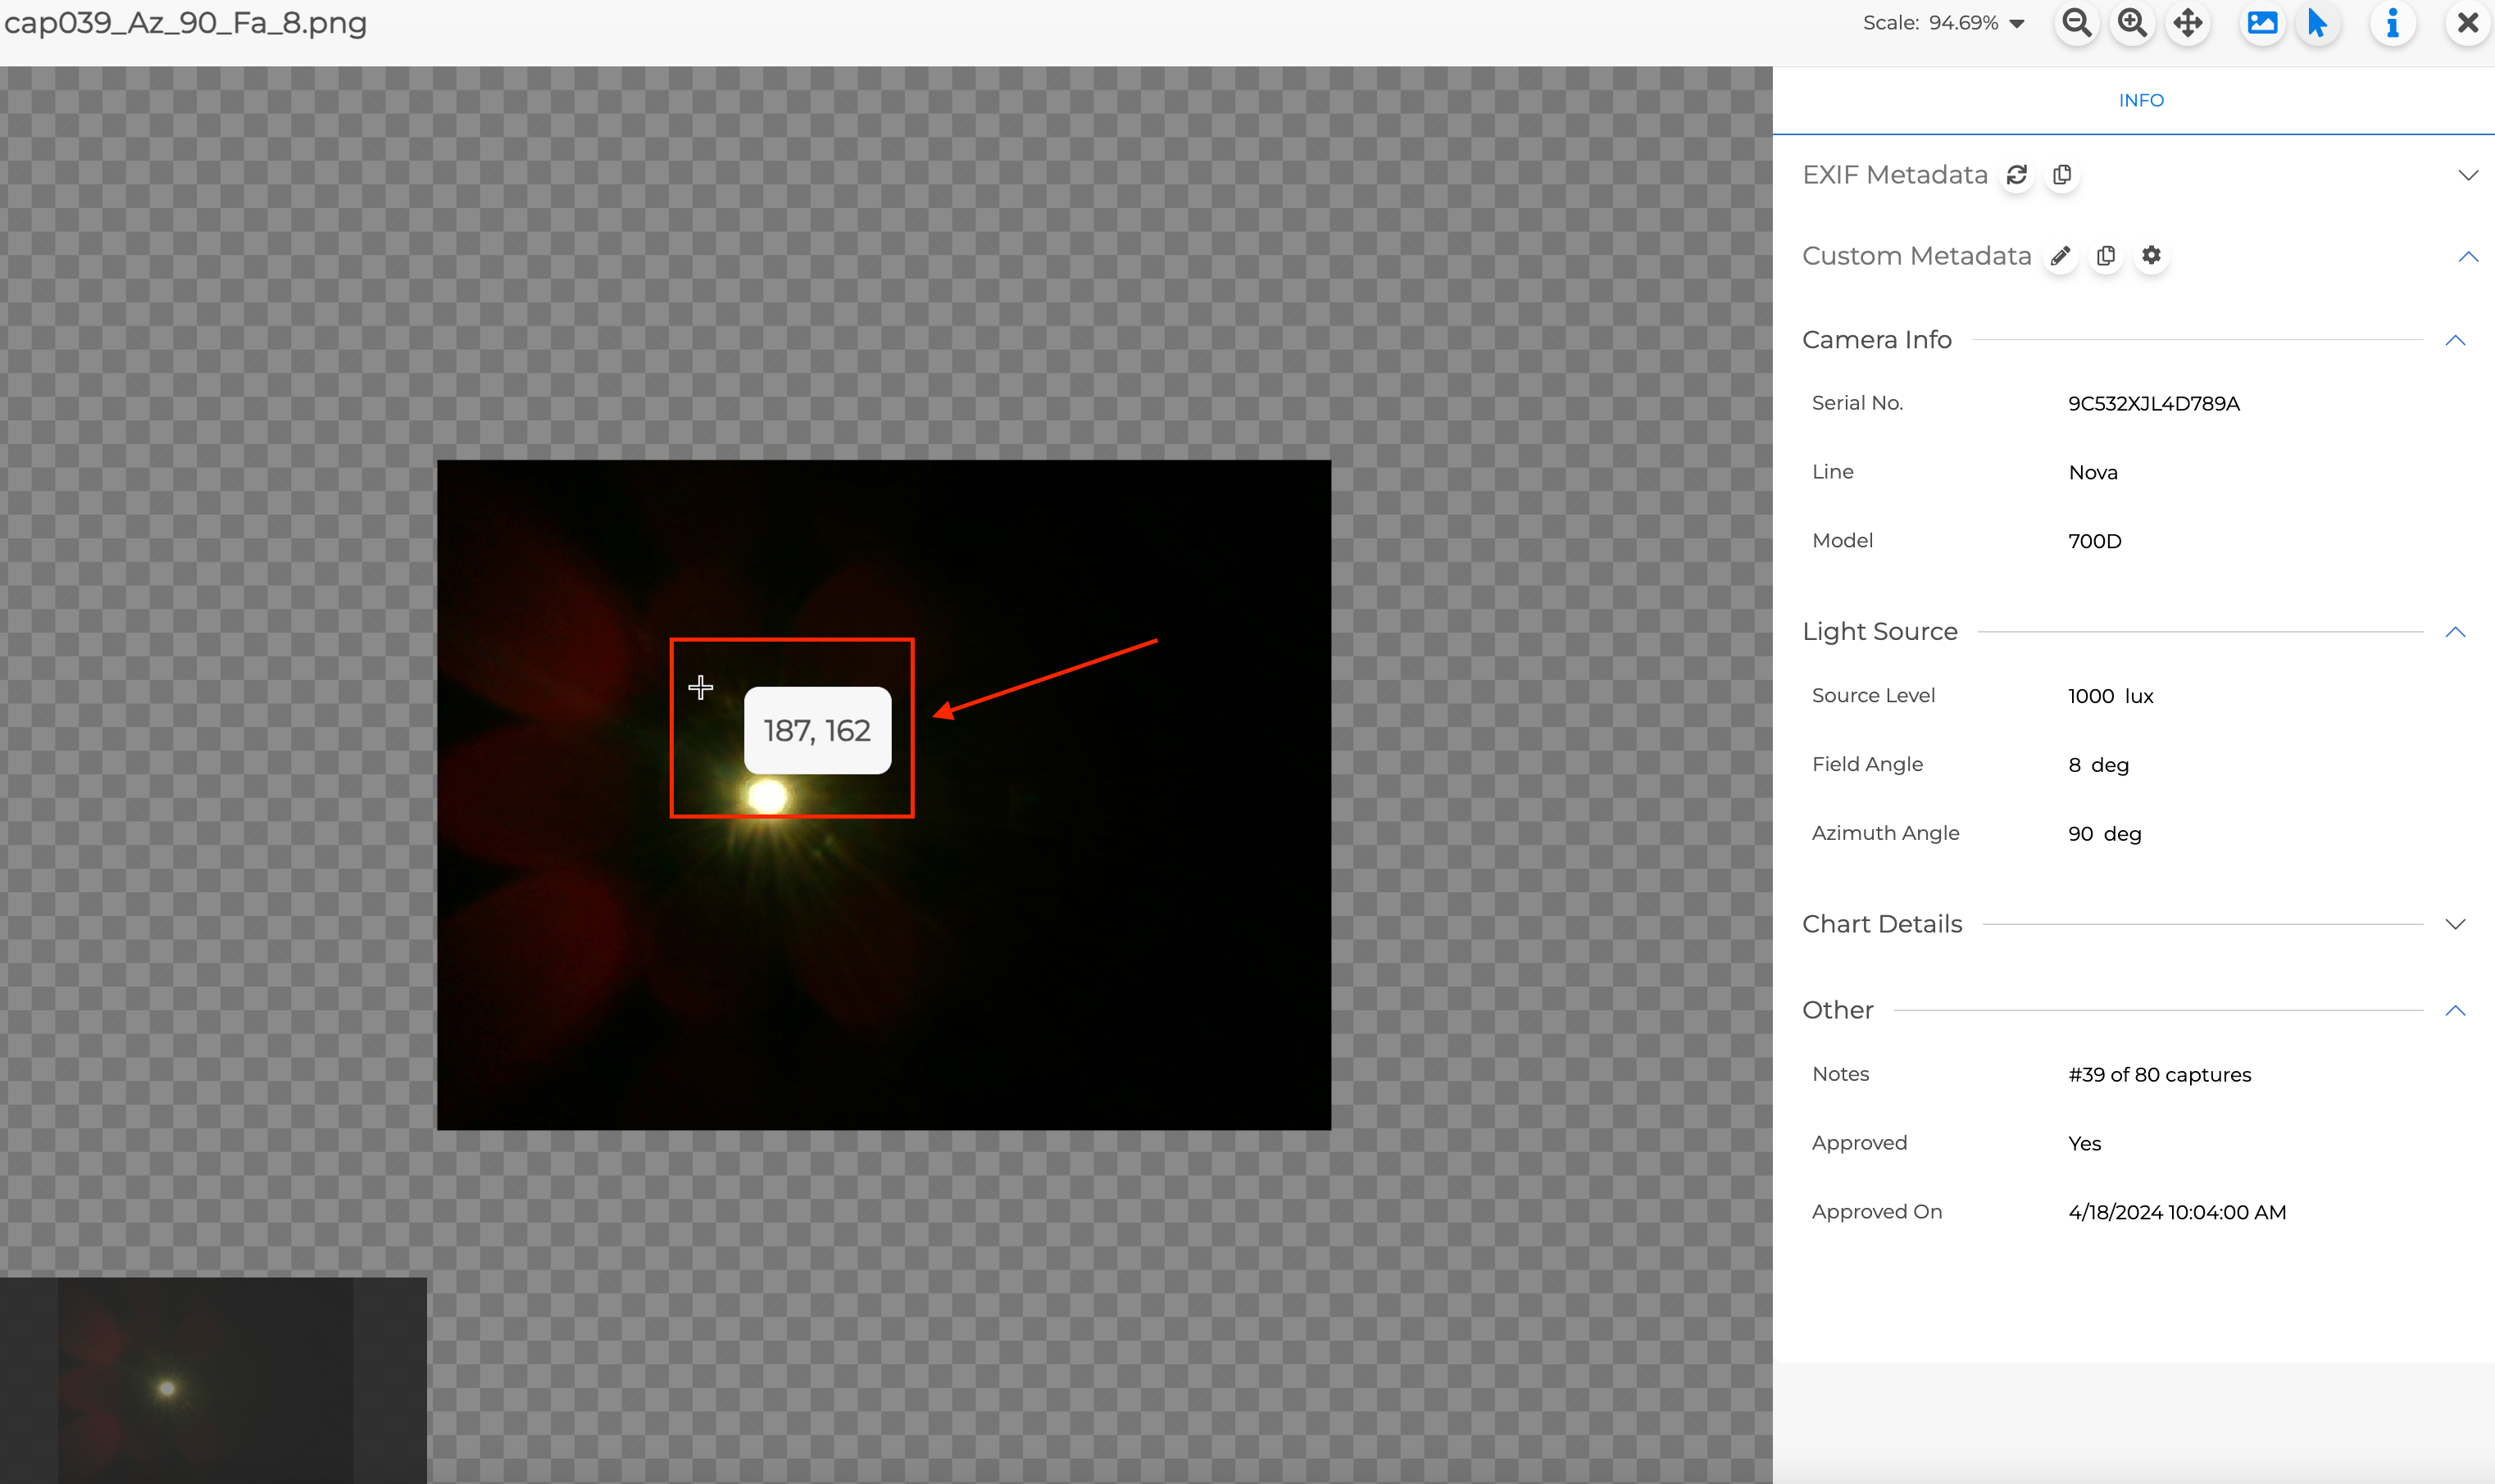
Coordinate Tooltip |
Coordinate Tooltip shows x and y coordinates relative to the top-left of the image. Please note that x coordinate increases when moving from left to right of the image and y coordinate increases when moving from top to bottom. |
 |
|
6 |
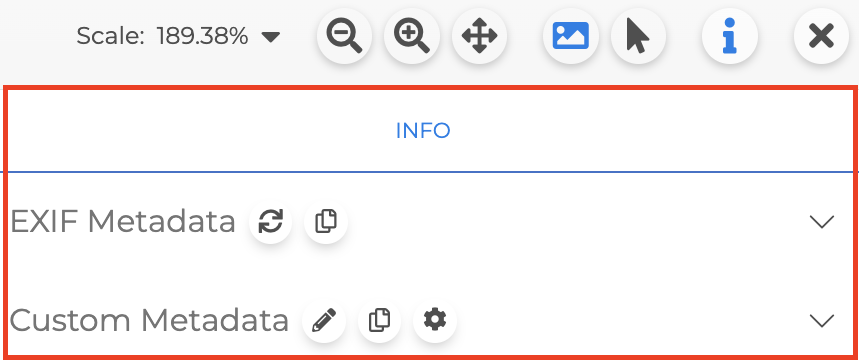
Metadata Panel |
Metadata Panel consists of EXIF Metadata and Custom Metadata. For more information, please visit Custom Metadata. |
 |
|
7 |
Close |
Close Image Preview dialog. |
To go to Multi-Image Preview, click on Images Icon as shown below after selecting multiple images.
![]()
In Multi-Image Preview, to change an image without needing to exit the image preview, simply click on the image slide at the bottom of the image preview.
Please note that if the image is not viewable, that image will not be included in the slides.