The combined output has not yet been implemented.
Suppose you need to perform a set of tests on a single camera that requires several images from different modules to be analyzed, and you want to combine the results into a single report. Prior to Imatest 4.5 each file had to be run individually, and there was no good way to combine the results. This issue has been dealt with in Imatest 4.5 with the introduction of the Autobatch module.
With Autobatch you can put all image files for a device in a single folder (along with an optional INI file) then run all the files in a single click (without additional user input). Key requirements
- The module name must be included in the file name. We recommended delimiting it with underscore characters (_) for clear visibility. It is case-insensitive. Here is a list of supported modules.
| Slanted-edge | SFR | SFRplus | eSFR ISO | SFRreg | Checkerboard |
| Other sharpness | Random (Spilled Coins) | Star | Log F-C | Wedge | |
| Flat field | Uniformity | Blemish | |||
| Color, tone | Colorcheck | CC24 | CCSG | IT8 | |
| Distortion, etc. | Distortion | Dot |
Other modules may be added in the future. In general, we recommend modules that support auto-detection or analyze the entire image.
Module name examples: eSFR-ISO_LX7_300LUX.JPG SFRplus_iPhone_5.JPG
- Images may contain several charts to be analyzed by different modules as long as they’re compatible (i.e., only one chart can use registration marks for automatic detection.) In practice this means that you can combine a Colorchecker (24-patch) with a chart that uses registration marks for auto detection (Spilled Coins, etc.).
- Only one automatically-detected slanted-edge module (SFRplus, eSFR ISO, SFRreg, or Checkerboard) is allowed in an image. Charts for these modules should generally not be combined with other charts.
Running Autobatch
To prepare an Autobatch run, create a folder that identifies the device under testing. Save all image files for the device in this folder. An optional ini (control) file (see details below) may also be saved in this folder.
To run Autobatch, Click Utility (on the Imatest main window), Autobatch. This opens the Autobatch window.
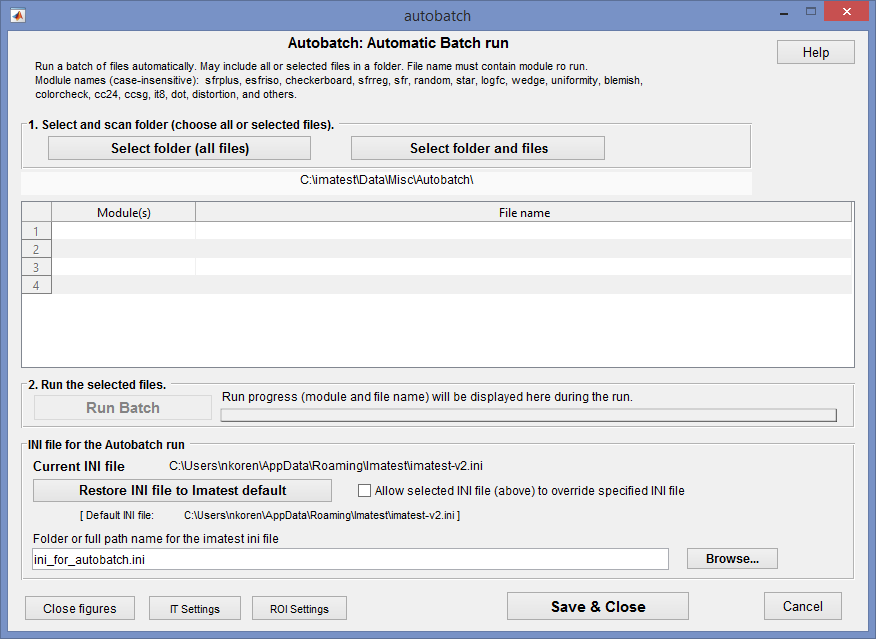 Autobatch opening window
The first step is to select the files using one of the two buttons in the 1. Select and scan folder section.
- Select folder (all files) Select all files in a folder. (The Matlab uigetdir function does not show the individual files.)
- Select folders and files Select a folder and choose a file or batch of files to run. You can use standard techniques for selecting batches (shift-click, control-click, etc.). Here is an example of the selection.
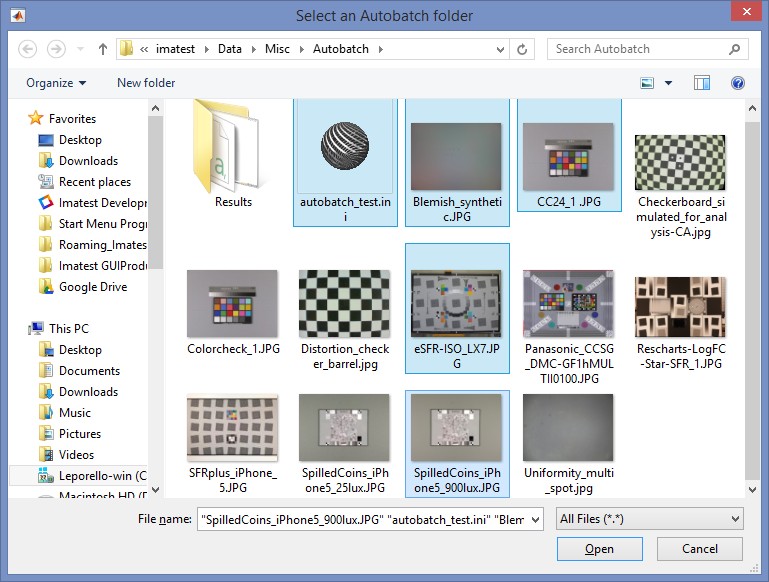 File selected files (one INI, four images)
When the files have been selected the file table is populated and the Run Batch button is enabled and highlighted.
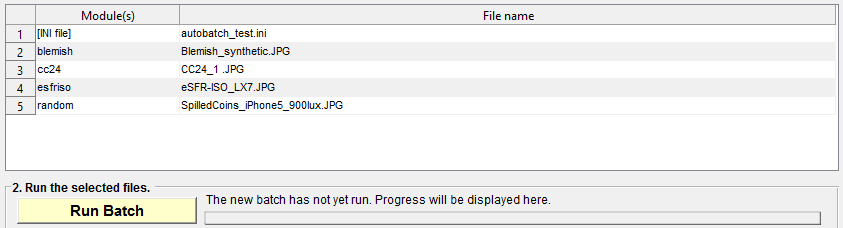 Table of selected modules and files
Pressing RUN Batch starts the batch run. You may see results images popping up then disappearing on the screen. Progress is shown to the right of the Run Batch button. When the batch is complete it will be indicated and the bright yellow color will return to normal background gray.
![]() Batch progress
Batch progress
Results are saved in subfolder Results of the image file folder.
Settings
INI file (contains the settings that controls the run).
- The default is to use the standard ini file for Imatest runs: imatest-v2.ini. [Default] will be displayed to the right of Current INI file.
- An INI can be specified in the INI file for Autobatch run region in the lower part of the Autobatch window. The default setting is shown above. If an alternative INI file is shown, this section will look like
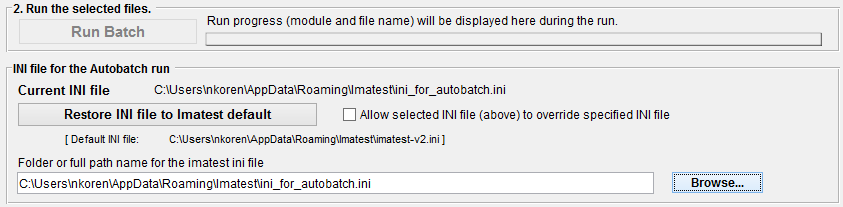
Though it isn’t the default, this setting is recommended because the standard imatest-v2.ini is often changed in the normal course of running Imatest.
- If Checking the Allow selected INI file (above) to override specified INI file is checked and a single INI file in the image folder has been selected, it will override the INI file setting in this region.