| Imatest 5.0: All functions of Imatest Image Sensor have been incorporated into Imatest Master. |
Introduction
Imatest now includes the ability to acquire images directly from your Android device for Android API level 15 and above (i.e. Icecream Sandwich and more recent). Using the include Android app, ImatestAcquire, (and in some cases the service ITSservice) Imatest is able to remotely issue acquisition commands and download the resultant data over USB. With ImatestAcquire, Imatest can now remotely test Android devices.
ImatestAcquire can capture images with help from a built-in camera app on the Android device, or using Android’s CameraITS for select devices (see list below). Acquiring from the built-in camera app is available for all devices and if there are more than one camera app present on the device, the user can select their preference. This mode of operation provides the functionality of a point-and-shoot camera and does require user input on the Android device (e.g. the user has to press the shutter button). For devices that support Android’s Camera 2 API , ImatestAcquire can operate in a fully-automated manner and gives the user the access to important acquisition settings: ISO sensitivity, exposure duration, image size, and image format (YUV, JPEG, and RAW[1]).
*NOTE* As of Imatest 5.0, image acquisition capabilities can be found in Imatest Master. Prior to Imatest 5.0, image acquisition was in Imatest IS.
ImatestAcquire Android app

When the ImatestAcquire app loads, the main activity (shown above) is displayed. The user interface consists of Connect, Take Picture, and Settings buttons with associated status indicators for the former two buttons. Since Imatest interacts with the app in an automated manner, there generally is no need to make use of the various controls. Regardless, the details will be expressed below.
Upon starting, ImatestAcquire begins searching for a connection so that Imatest can connect automatically with ImatestAcquire. The Connect button can be used to manually trigger ImatestAcquire to start looking for a connection, should the need arise. While it is waiting for a connection, the message ‘Waiting for connection‘ will be displayed. Once a connection has been established, the status indicator will change to ‘Connected to /127.0.0.1 on Port 2112‘, for example. If a connection is not made by the timeout period, then ‘Connection has timed out. Please try again.’ will be displayed.
Pressing the Take Picture button will manually trigger an image acquisition using the stored settings and attempt to transmit the image. Note that Imatest IS automatically triggers image acquisition, so there is no need to use this button.
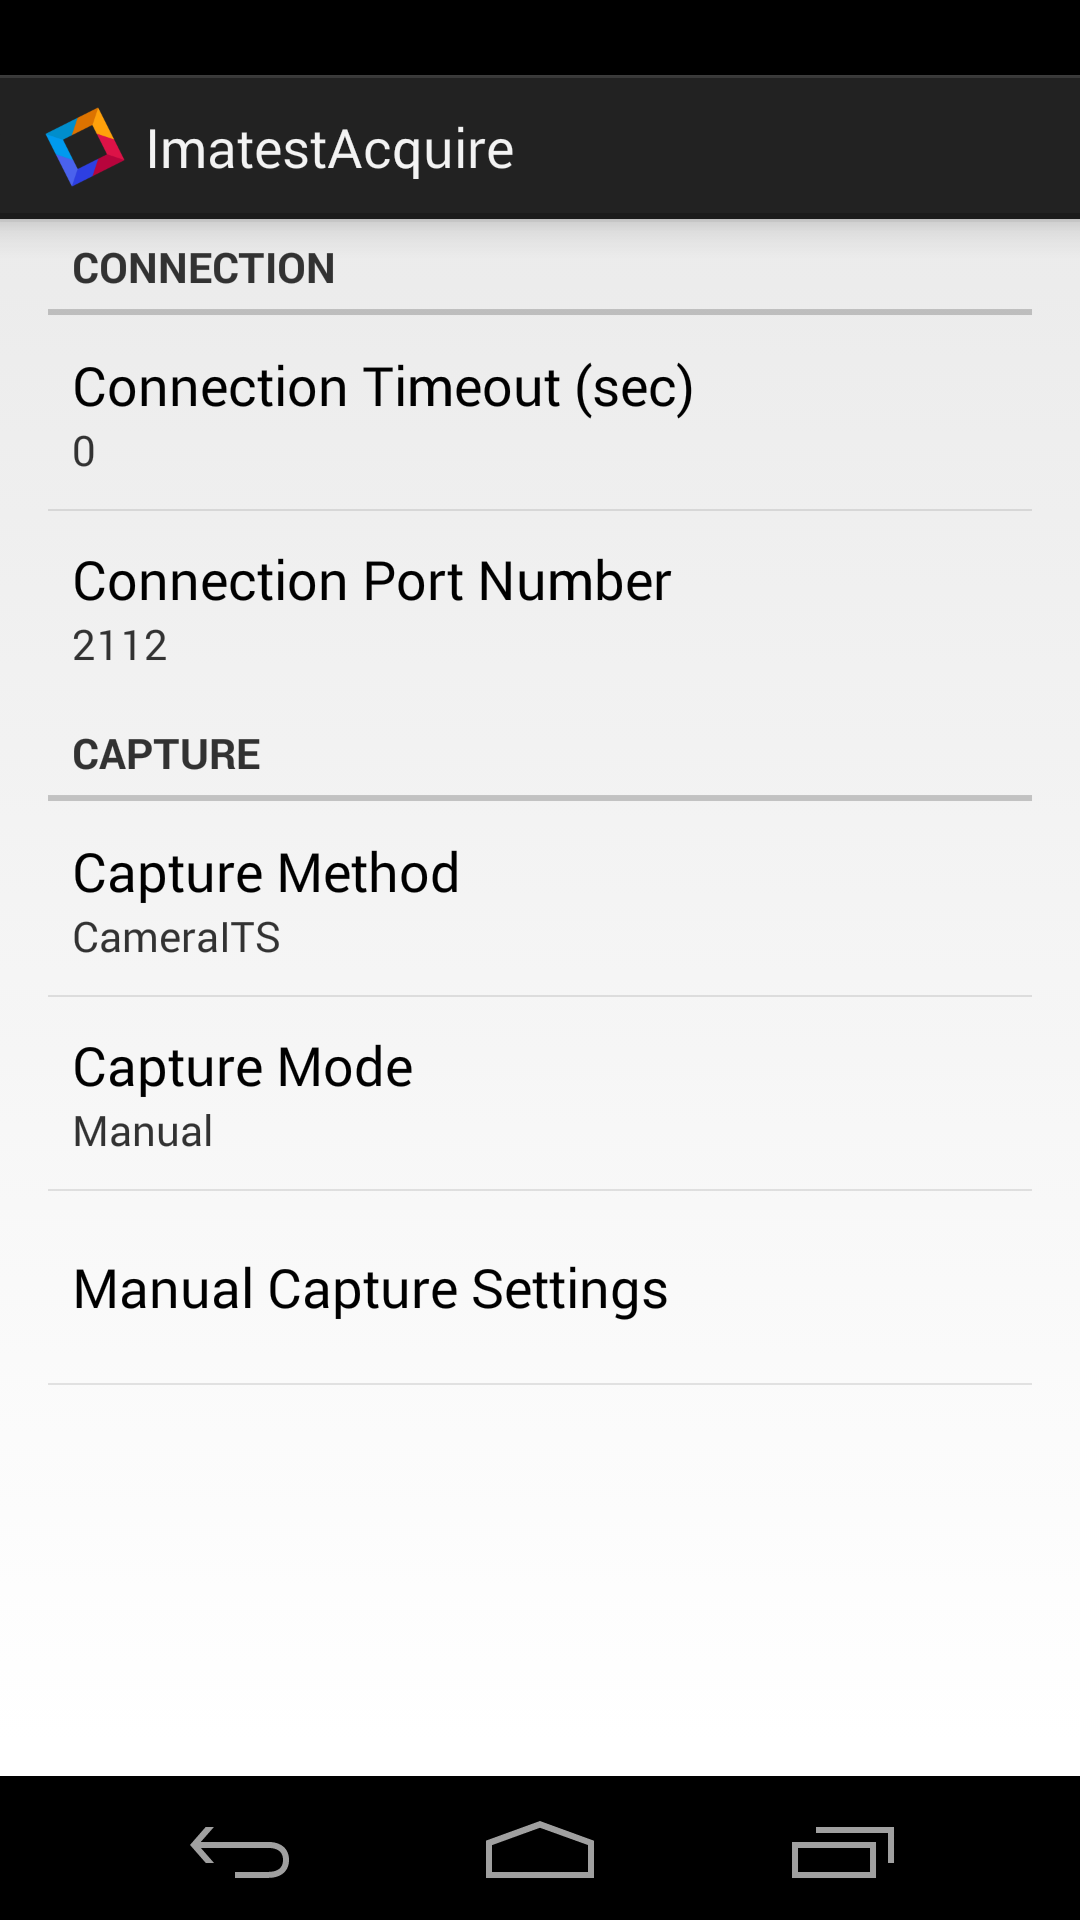
The Settings button opens the Settings Activity.
Settings activityThe Settings activity provides access to the following capture- and connection-related settings:
Note that when Imatest requests a capture from ImatestAcquire, these settings will be overwritten. |
 |
Manual Capture Settings activity
The Settings activity provides access to the following Manual capture-related settings:
Note that when Imatest requests a capture from ImatestAcquire, these settings will be overwritten. |
 |
Configuring your Android device
In order for your Android device to be able to communicate with Imatest, the device must be connected via USB to the host computer and USB debugging must be enabled on the device. Enabling this options allows for communication over USB with the host computer. The option for enabling USB debugging is accessible from the ‘Developer Options’ sections in the ‘Settings’ app. For API level 17 (Android 4.2) and above, Developer Options is hidden by default. For devices with API versions 15 or 16, please skip to the Enable USB debugging section.
Enabling Developer Options
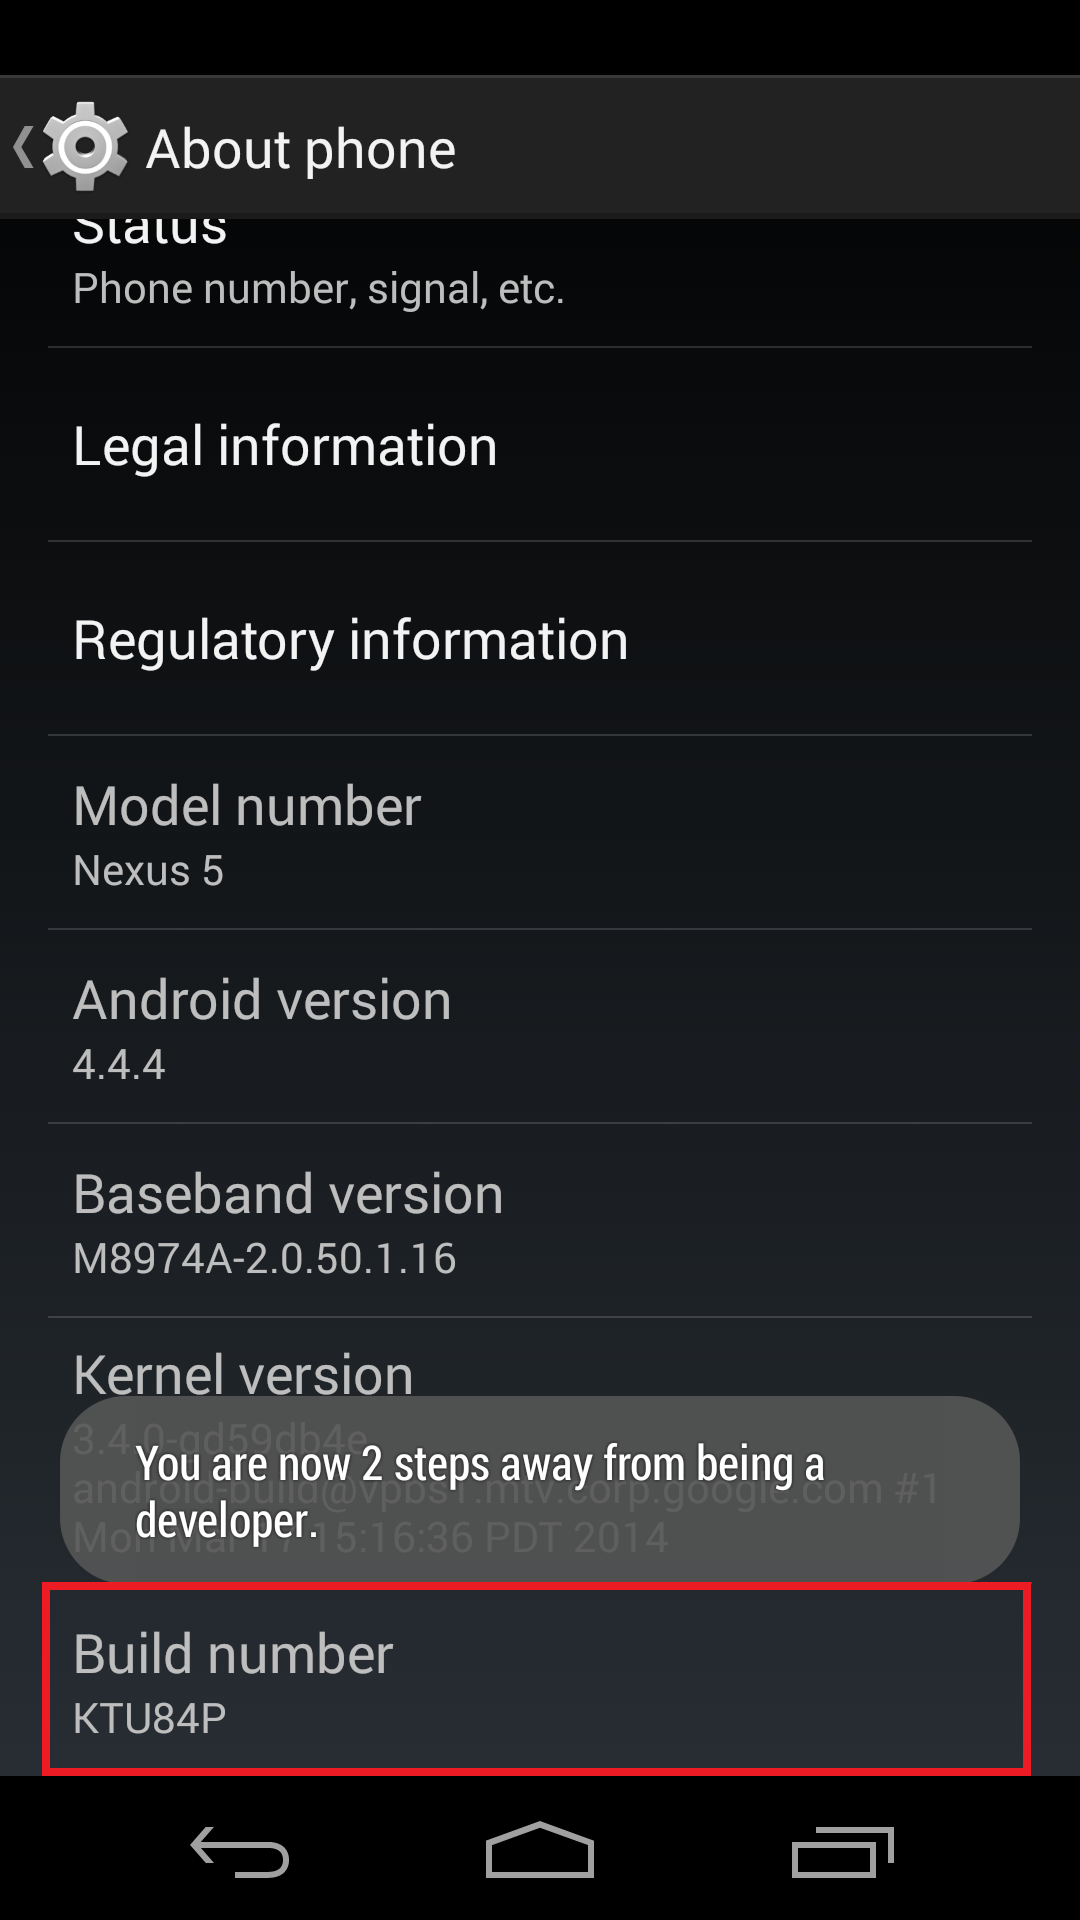
The process for enabling Developer Options may vary slightly between devices and in this example a Google Nexus 5 is used. To enable, open the Settings app and scroll down to select the About Phone section. Within About Phone, scroll down to Build Number and tap seven times on Build Number. After three, taps an encouraging toast will be displayed (see below).
Enable USB debugging
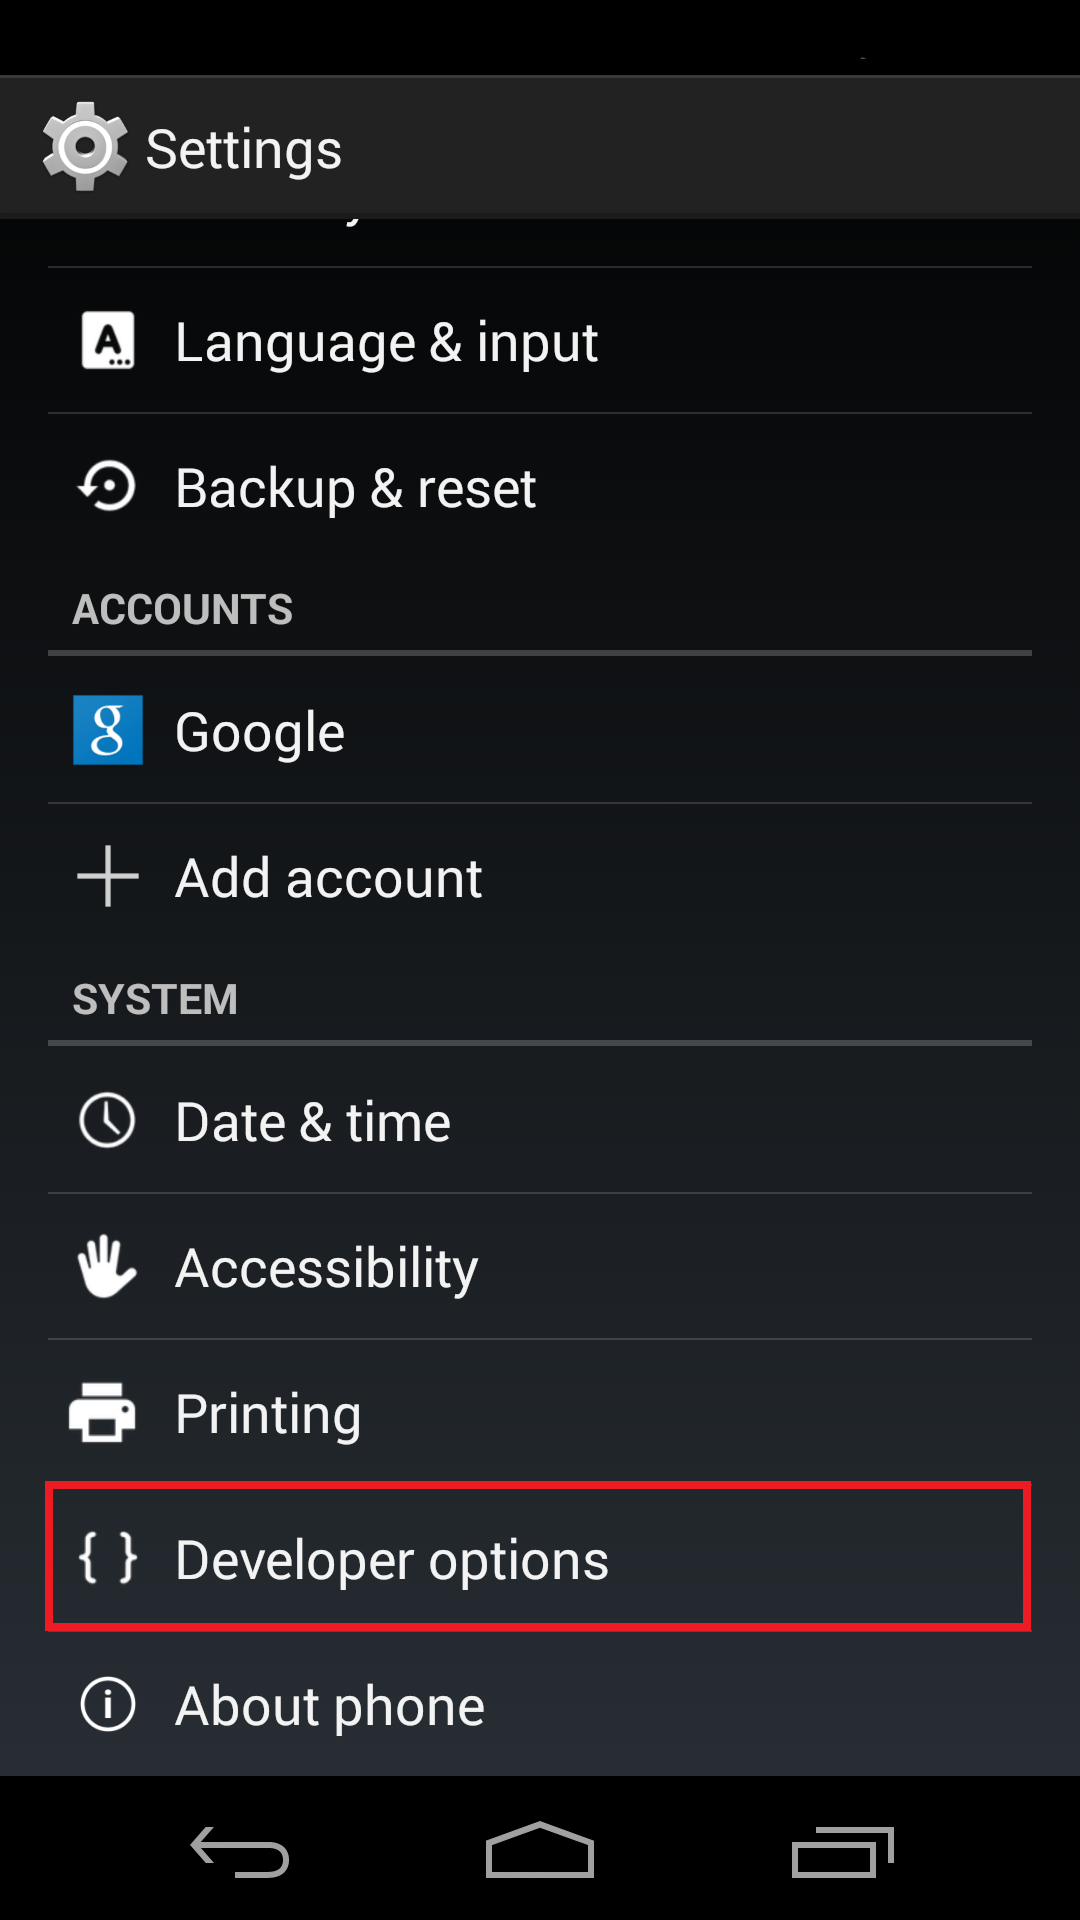
Next return to the Settings app, scroll down, and select the Developer Options section.
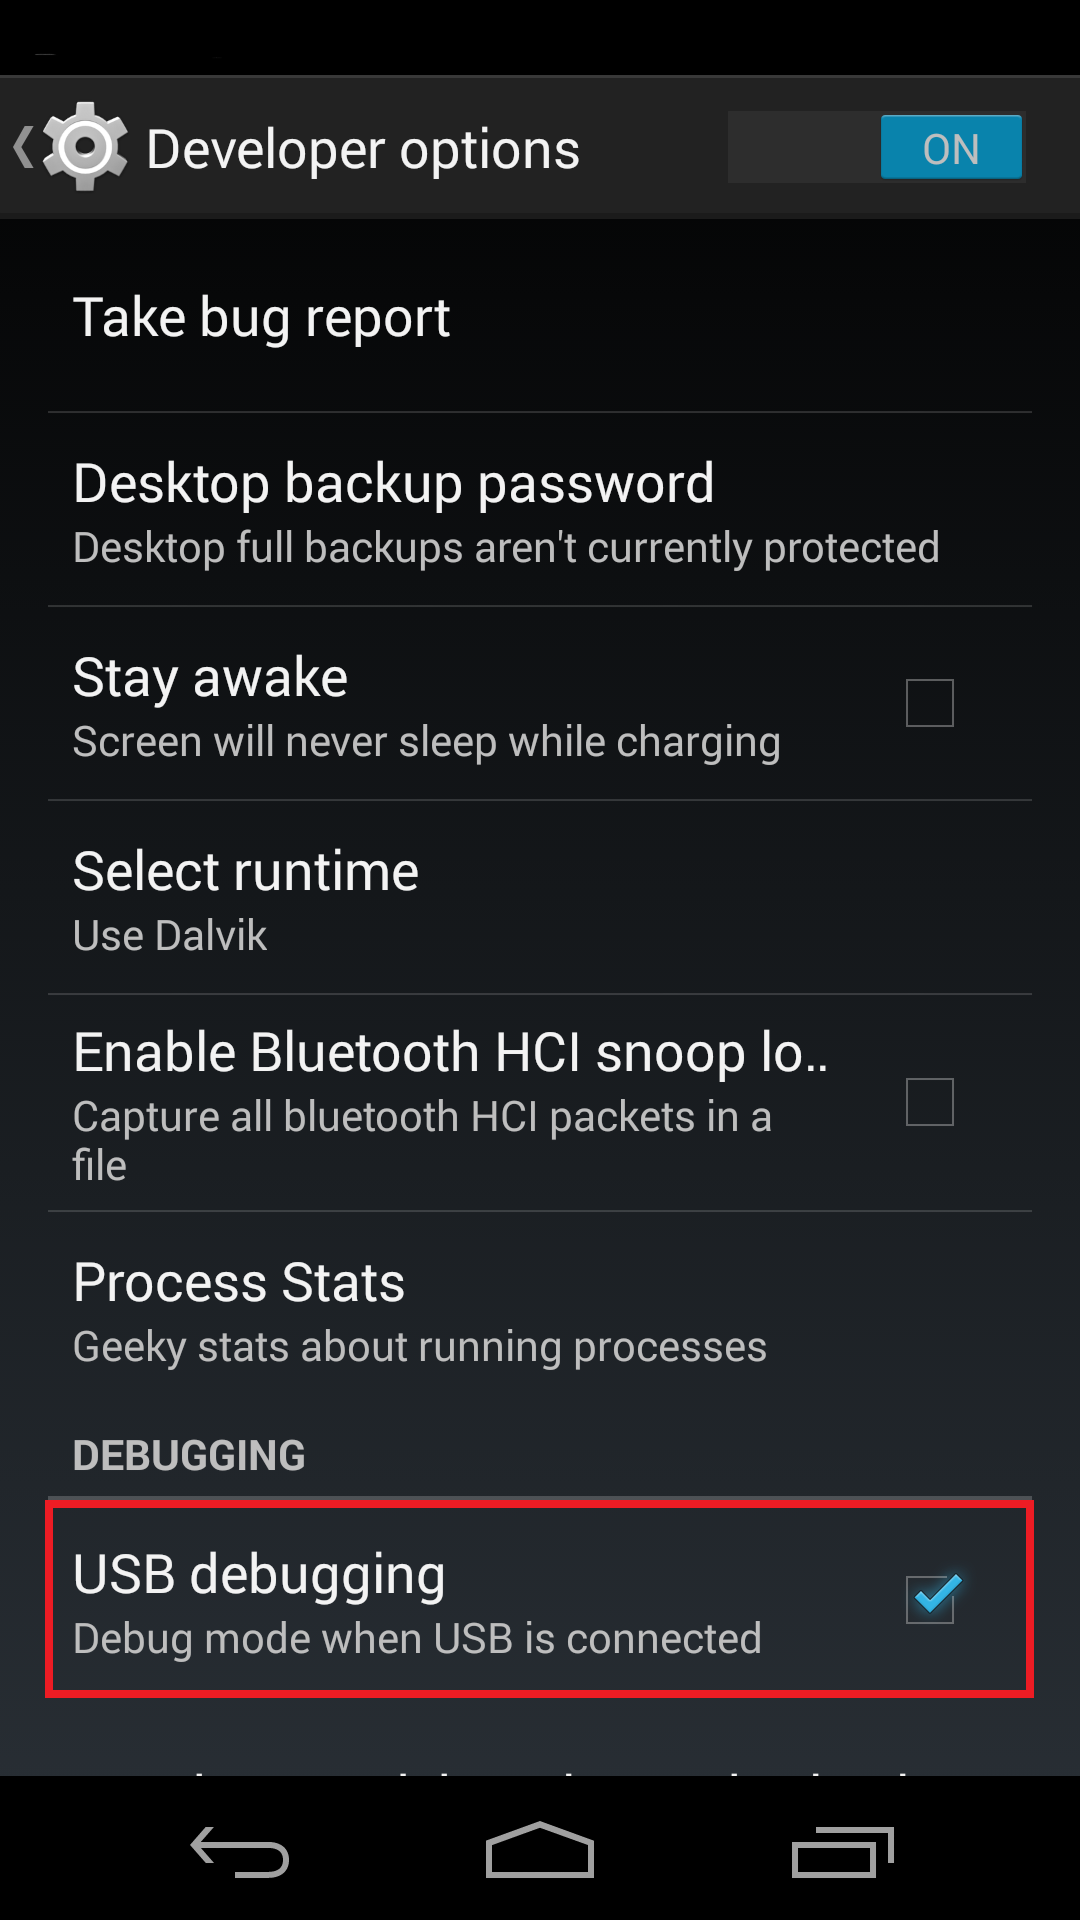
Within Developer Options, select USB Debugging and now the device is configured.
Note that on some devices the Developer Options can be re-hidden without a factory reset of the device. To accomplish this, open the Settings app and select the Apps section. Scroll all the way over to the All section and then scroll down to select the Settings app. Click the Clear data button and now the Developer Options section is now hidden again.
Configuring Imatest 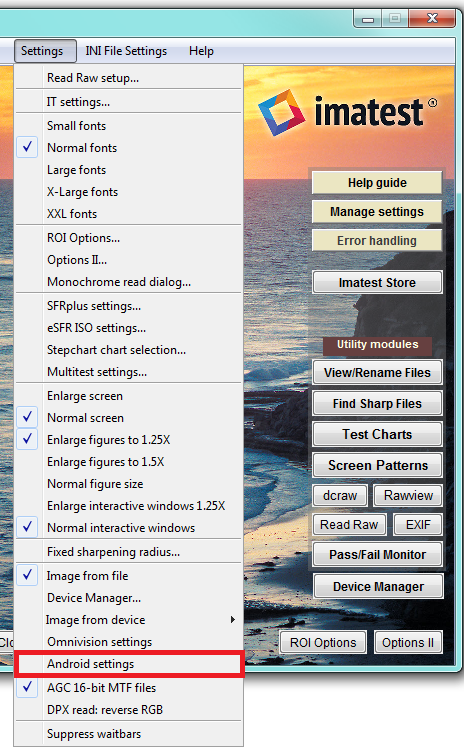
In order acquire using Imatest, first the connection and capture settings must configured using the Android settings window and Imatest must be set to acquire from Android.
Android settings window
The Android settings window is used to select an attached Android device and define the acquisition settings for that device. This window is accessible from the main Imatest window via the Settings menu and the Android settings menu item. Note that it may take a second for the window to appear since the dialog must poll for available Android devices.
Connection configuration section
This section allows the user to create the connection with their Android device. Imatest communicates with the Android device through a tcp connection that is forwarded over USB. Due to this connection, there are settings made available for both the Android Device port and the host Computer port. Generally the ports do not need to be changed.
If your device is properly configured as detailed above, then when the dialog loads the serial number for your device will be listed in the Select device drop-down menu (if it is not please ensure that USB debugging is enabled as discussed above). When a device is selected, Imatest will install the ImatestAcquire app (and ITSservice for supported devices) and enable the Start ImatestAcquire, Reboot device, and Stop ImatestAcquire buttons. These buttons allow the user to start ImatestAcquire from a fresh state on the device.
Acquisition settings section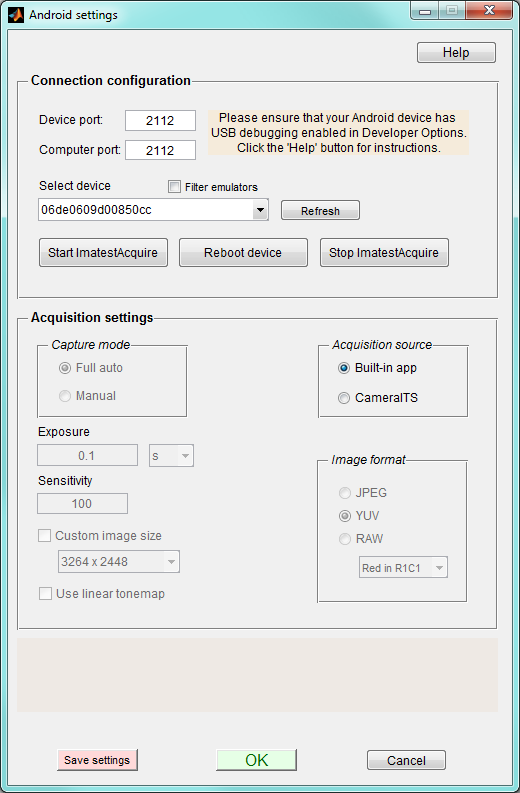
In this section lies the various controls needed to define a capture. The first radio button group is the Acquisition source group, which allows for capture from either a Built-in app or CameraITS. Acquiring with the Built-in app will invoke a user-selected camera app on the device to acquire the image. The CameraITS option will acquire an image from Android’s CameraITS service, that is only available for certain devices. Selecting Built-in app disables all of the other controls in this section as they are only available for CameraITS. Note that for devices that do not support CameraITS, the only available acquisition source is Built-in app.
The CameraITS selection enables controls for Capture mode, Image format, Exposure, Sensitivity, as well as a drop-down menu for custom image sizes and a check-box for forcing a linear tonemap. The Capture mode group has the following options:
- Full-auto – performs full 3A event – Auto Focus (AF), Auto White Balance (AWB), and Auto Exposure (AE)
- Manual – AF and AWB only
The Full-auto capture mode disables the other controls and additionally is only allowed the YUV image format. For the Manual capture mode, the exposure duration, ISO sensitivity, and image size can be modified, as well as whether or not to use a linear tone-map. Note that the limitations on the exposure duration, sensitivity, and allowable custom sizes are dictated by the device. Furthermore, the device dictates the allowed image formats, for which in Manual mode all allowed formats are accessible.
Enabling Android acquisition from Imatest
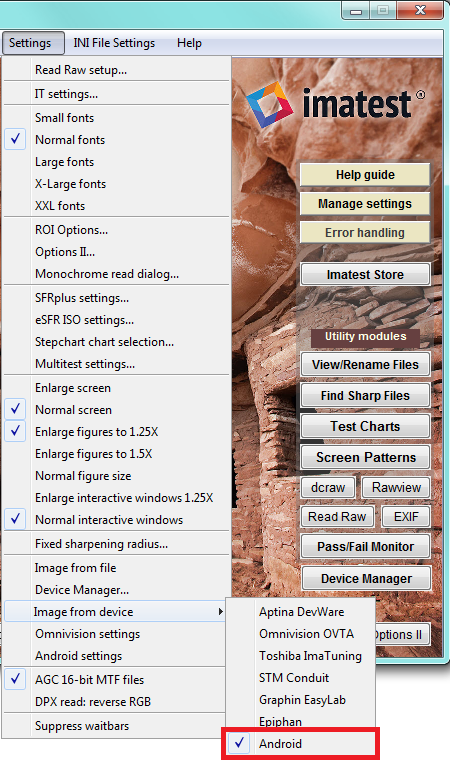
To enable Imatest to acquire from Android, click on the ‘Settings’ menu on the main Imatest window. Next select ‘Image from device’ and finally ‘Android’. Now Imatest is ready to acquire from the attached Android device.
List of supported devices for CameraITS (Camera 2)
- Google Nexus 5
Known issues
- Certain Android devices, such as the Nexus 5, have difficulty communicating reliably over USB3 ports. If after just a few captures, you receive an error that states ‘error: device offline’, please try again with your device plugged into a USB2 port.
[1] As of the writing of this document, Android has not yet added the RAW support in the Camera 2 API. RAW support should become available when Android fully releases Android API version L.