In Imatest 5.0 a new processing utility has been added called Test Manager. Test Manager allows the user to parallel process batches of images using Imatest’s image quality algorithms. The Test Manager is well suited for when a large number of images have been acquired by a single camera. These images can be of any chart supported by any module of Imatest; the user merely needs to specify which module to run for each image.
Other features include:
- Parallel processing of image analyses
- Import images and capture information from the Database
- Import image files and information encoded in the file names using a user-defined naming convention
- Submit image capture information to the Database
- View results after the analysis has completed
Getting Started
Launching Test Manager
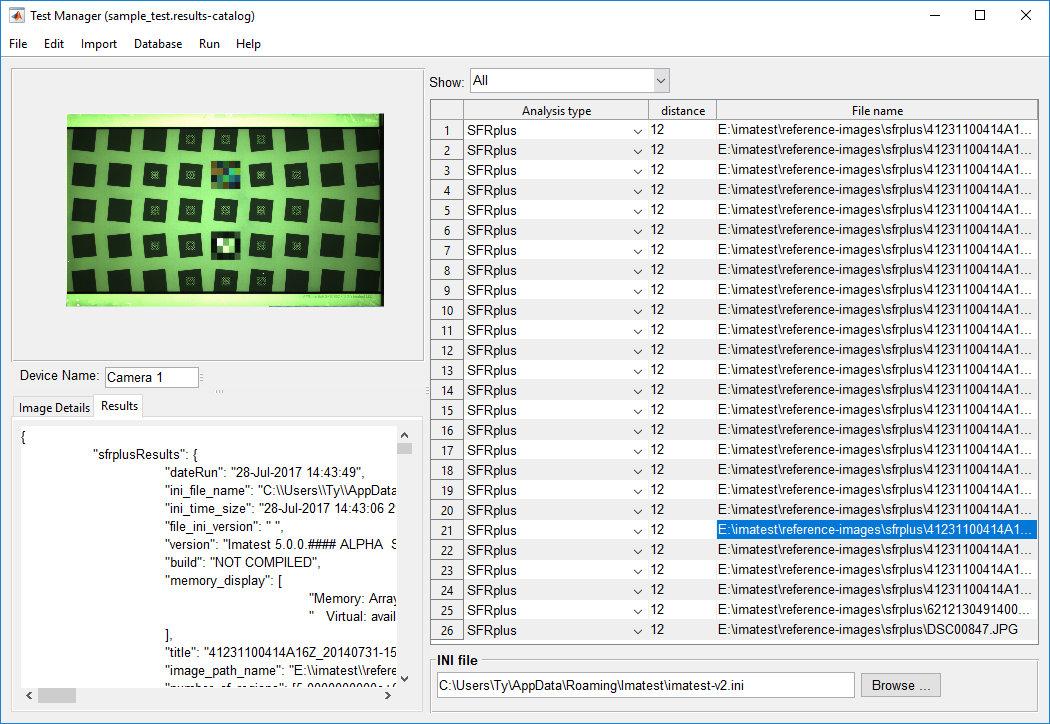
The Test Manager is opened by clicking the Test Manager button in the Data tab on the Imatest main window.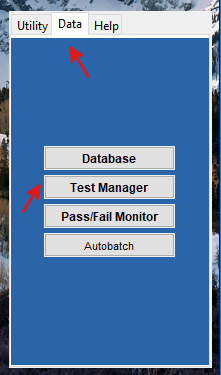 After a moment, a blank Test Manager main window will appear.
![]()
Starting an analysis
The starting point is to either open a previous analysis, or to create a new one. 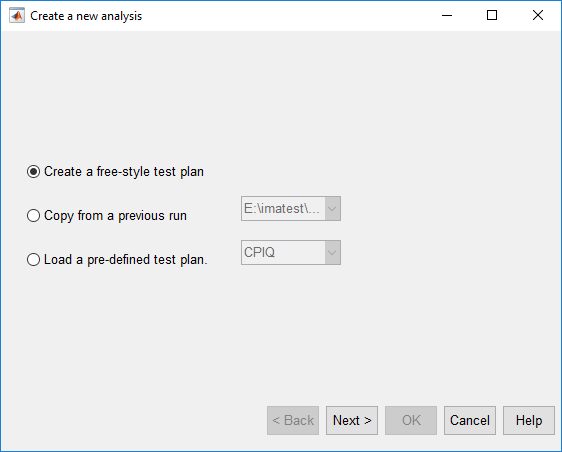 To begin a new analysis, select the File menu and then New … and the following window will appear:
The options to proceed are
- Create a free-style test plan – choose this option to start a new test plan
- Copy from a previous run – choose this option to copy the test plan from a previous analysis
- Load a pre-defined test plan – choose this option to load test plans, such as the one defined for CPIQ
In this example, ‘Create a free-style test plan’ is selected and after pressing the ‘Next >‘ button, the next panel is shown
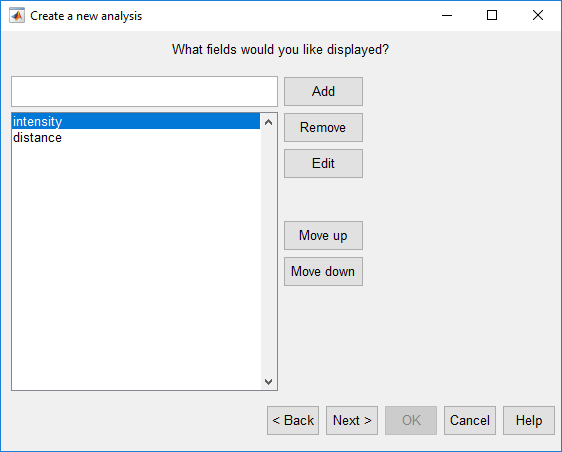
In this panel, the user is given the option to add their own labeled columns to the main table view of the test manager, and order their display. After any desired table column names have been added, click the ‘Next >‘ button
Defining a file naming convention
In this panel the user can define their own file naming convention used when importing images into Test Manager.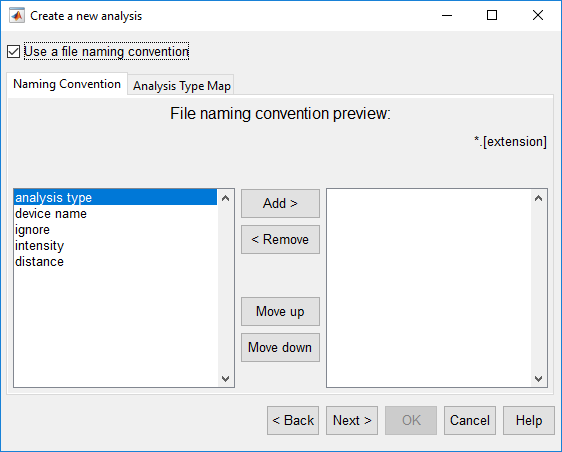 This feature is useful if the user has encoded data in the file names of their images, such as the device name, analysis type, device name, or any data corresponding to the table fields defined in the previous step. By defining the file naming convention, Test Manager can automatically import the data encoded in the file name into the table view.
In this example, ‘intensity’ and ‘distance’ were added as table columns and have been carried over into this panel. To define the file naming convention, select the desired element on the left and press ‘Add >‘.
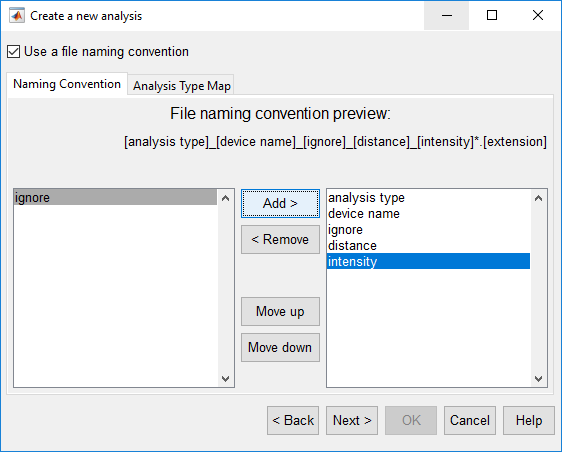
Once the naming convention has been added to, the preview will update. In the above example, the file naming convention is defined as [analysis type]_[device name]_[ignore]_[distance]_[intensity]*.[extension]. This file naming convention instructs Test Manager to look for sets of characters separated by underscores (i.e. ‘_’) and map them according to the table column. In this case, Test Manager would interpret the first set of characters as the desired analysis type for the image, the second set as the device name, ignore the third set, copy the fourth set to the distance column, and the fifth set to the intensity column.
In the ‘Analysis Type Map’ tab, the user can define what values of [analysis type] map to which Imatest analysis modules. Shown below is the default mapping of analysis type. For example, if the user imported files that began with ‘blemish_’ or ‘checkerb_’, then from the analysis type map shown below, Test Manager would to set the analysis type column to ‘Blemish’ and ‘Checkerboard’, respectively.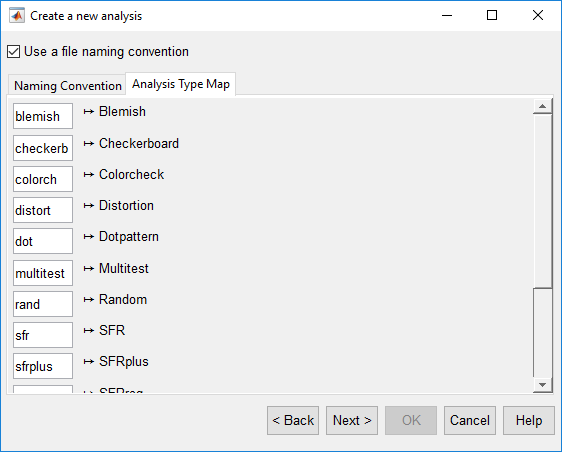
Once satisfied with the, file naming convention, click ‘Next >‘.
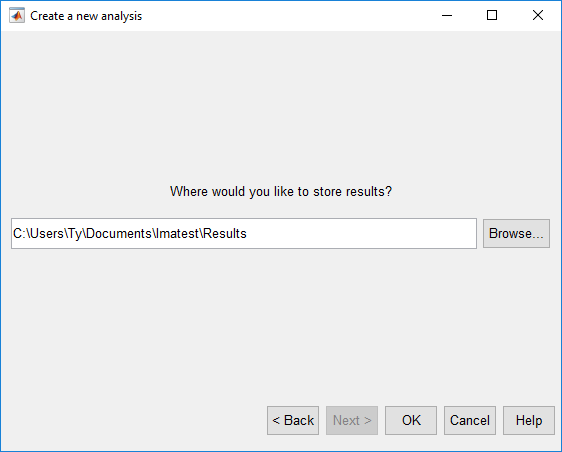
Setting the global save folder
In the last panel, the user can set the folder into which all results, such as plots, are saved. Once complete, click ‘OK‘.
Adding images
To add images to the analysis, select the ‘Import’ menu in Test Manager and choose either ‘Images from file …’ or ‘Images from database …’.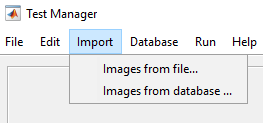
Adding image files
Selecting Import:Images from file … opens a standard file-selection dialog window. Select any desired files and click the ‘Open‘ button. If the user elected to use a file-naming convention, the data encoded in the file names will be imported accordingly.
Adding images from the database
Selecting Import:Images from database … opens the following window that lists the image currently registered in the database.
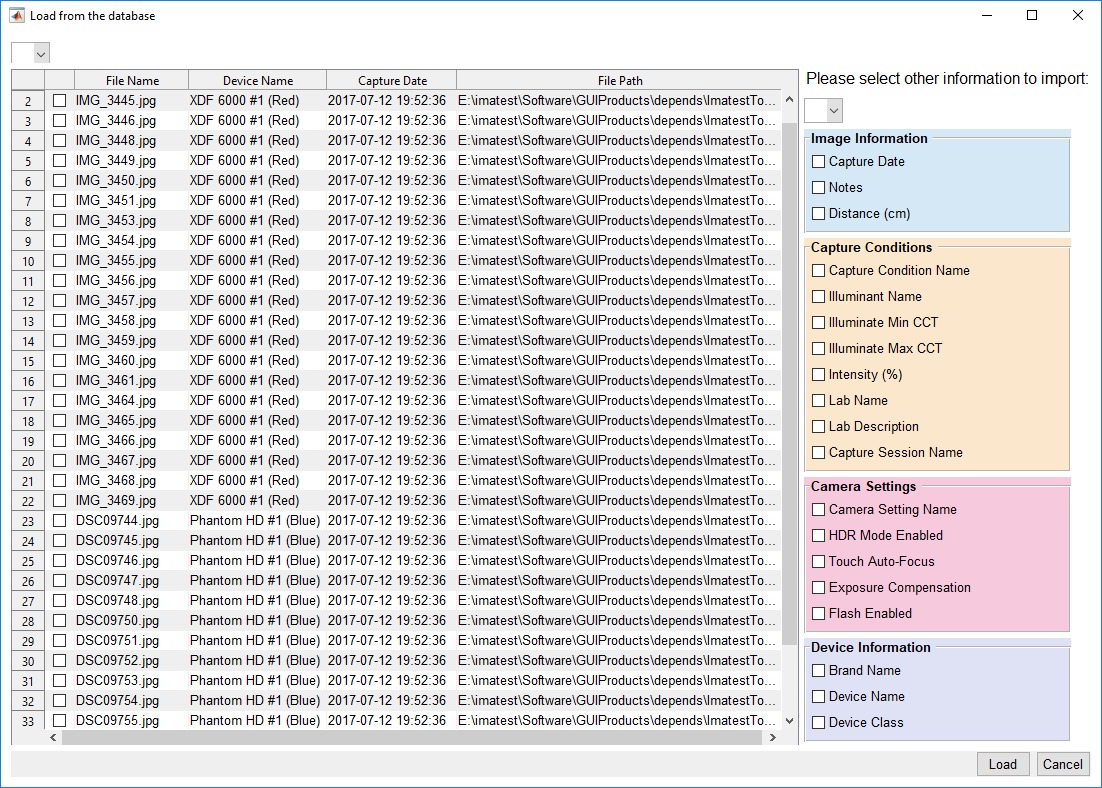
This window allows the user to selectively import images from the database, and the image capture information associated with the images.
To select an image for import, click on the checkbox in the leftmost table column. Changes to the selection status for all of the displayed rows can be accomplished by the drop-down menu above the table.
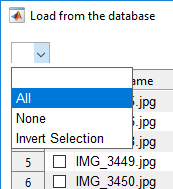
This drop-down offers three options:
- All: select all images
- None: deselect all images
- Invert Selection: deselect all selected images, and select all formerly unselected images
In addition to selecting the images, you can also select to import other information associated with the images using the checkboxes on the right-hand panel.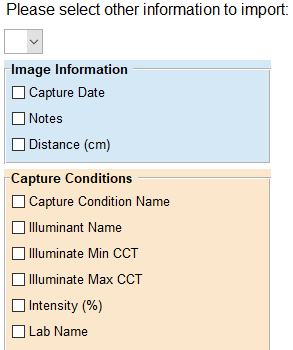
Once you have completed all of your selections, click ‘Load‘, and the images will be imported to Test Manager.
Submitting capture information to the database
Modifying fields in the table
The table fields can be modified individually, but to save time when a number row need the same values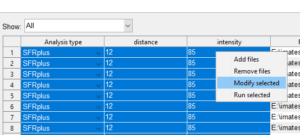 , you can modify in bulk. To modify in bulk, highlight all of the fields you wish to modify by selecting the first field, holding down the shift-key, and then selecting the last. Then, right-click on the highlighted fields and choose ‘Modify Selected’.
The next window to appear allows you to modify all selected rows and columns. The window will contain one editable field per selected column (excluding any file name and file path fields, which are read only). The value stored in a given field is the value to which all selected rows of the corresponding column will be set. For example, if the ‘distance’ field were modified and save, then all selected rows of the ‘distance’ column would be set to the new value. Make the desired changes and then click ‘Save’ to commit them Test Manager.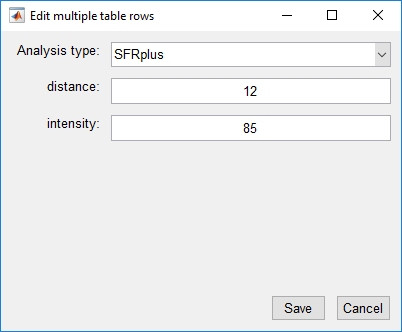
Running the analysis
Before the analysis can be run, you must first specify the Imatest INI file to use. Click the ‘Browse …‘ button in the INI File panel and choose an INI file.
Once you have specified an INI file, you can run the analysis of all images, only those of a particular analysis type, or single files.
Analyse all files
To analyse all the image files, go to the ‘Run‘ menu and select ‘Analyze all‘. Test Manager will begin analyzing all of the images. Note that if parallel processing is enabled, there will be a short delay while the parallel worker processes are started.
Analyse a single analysis type
To analyse a single analysis type, first select the analysis type from the ‘Show‘ drop-down menu 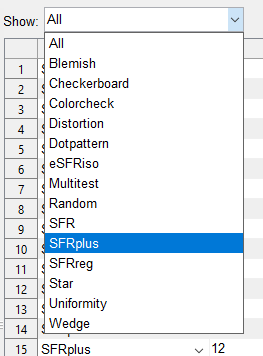 above the table. Next, go the ‘Run‘ menu and select ‘Analyze current category‘.
Analyse selected images
To analyse selected images in the table, highlight a group of rows, right-click on the row and select ‘Run Selected‘. 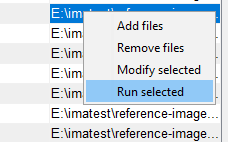
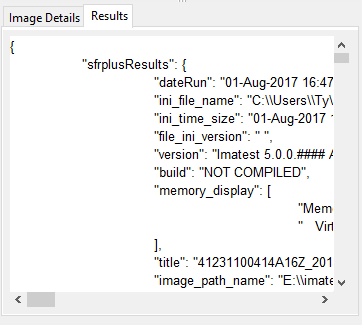
Viewing Results
After the analysis has completed, you can view the results for an image by clicking on any column in the images row and viewing the Results tab. JSON formatted results of the image’s analysis are displayed in the Results tab.