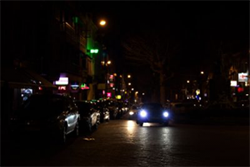
It is important to test your camera system in environments which reproduce lighting conditions similar to where you intend to use the camera in the real world. Failure to test a camera under low light conditions may lead to overstating the camera’s performance.
Image sensors collect light (signal) into pixel wells, then convert the resulting analog voltage levels into digital numbers. Dark current is where electrons are released from thermal activity which becomes indistinguishable from electrons released via photoresponse. The dark current that exists in uncooled image sensors leads to dark noise. At low light levels, exposures are longer to gather more light, which gives more time for dark-current electrons to be gathered. This leads to dark noise and read noise representing a larger portion of the overall response, which reduces the signal to noise ratio (SNR). Low-light conditions are most challenging for higher resolution sensors with small pixel pitches where the particle and wave nature of light can seriously impact the performance of your camera.
The definition of “low light” depends on the application. For mobile devices (compact camera modules) low light is defined by the IEEE CPIQ standard as 25 lux, which resembles a dimly lit indoor space representative of the worst cases where people expect their phones to function properly. As mobile devices get better in low light scenarios, customer expectations may shift. For security or automotive industries, the levels are much lower based on how dark the outdoor environment may get[1]:
| Condition | Illumination (Lux) |
| Sunlight | 107527 |
| Full Daylight | 10752 |
| Overcast Day |
1075 |
| Very Dark Day | 107 |
| Low-Light (CPIQ) | 25 |
| Twilight | 10.8 |
| Deep Twilight | 1.08 |
| Full Moon | 0.108 |
| Quarter Moon | 0.0108 |
| Starlight | 0.0011 |
| Overcast Night | 0.0001 |
In order to achieve light levels similar to the darkest scenes, most lab lighting setups that contain fluorescent or LED sources may not be able to be directly dimmed to very low levels, so the dim light levels may be achieved by a variety of methods shown in the following table. Ultra-low-light levels can be achieved by combining these approaches:
| Method | Light Reduction | Notes |
| Increasing distance (d) | Between 1 / d and 1 / d2 | Difficult to move large lighting setups, labs have limited available space |
| Reflecting off Munsel N5 painted walls | 0.18 | Most labs are painted with these sorts of walls, but rotating lights back and forth may be difficult to perform repeatably without a mechanical motion stage. |
| Reflecting off black painted walls | 0.05 | |
| Fresnel reflection from beam splitter |
0.04 |
Apparatus could impinge FoV and would also require repeatable rotation of lights. |
| Imatest Low-light filter (mask + neutral density filter) | 0.0125 | Manually attaches to these LED lights |
Eliminating additional sources of light within your lab is also important: Putting felt around doors to block light from other rooms, covering exit signs, covering indicator LEDs and power strips and installing baffling and light traps to block unwanted reflections.
Note: Verifying the low light levels can be challenging as many illuminance meters do not go to extreme low light levels.
Once you can reproduce low-light levels in your lab, you can perform tests to answer a number of questions about your system performance:
- Does the radiometric calibration for black level successfully reduce the effects of dark current without also eliminating useful signal that might impact the dynamic range of your system?
- Does the black level compensation work across the range of nominal operating temperatures that your sensor will experience?
- Does your ISP react appropriately to dark scenes by increasing the sensitivity (gain)?
- How consistently does your autofocus system (if you have one) perform under low light?
- What happens to moving objects captured under low light conditions?
- For security cameras with near-infrared ‘night-vision’ support: does the Infrared cutoff filter engage and disengage at the appropriate light level?
- Do the applied gamma curve(s) and tone mapping help to boost the perceived quality of the dark scene or assist the observer’s ability to recognize objects in the dark?
- Does the noise reduction strike the right balance of reducing visual noise without also blurring the appearance of relevant textures (skin and foliage) within the image?
A comprehensive tuning and testing regimen will involve performing a full battery of objective tests in a wide range of lighting conditions. By increasing the range of light levels you can reproduce in your lab, you can provide the most challenging condition in which you can validate the performance of your camera system.

