Stray light (flare) documentation pages
Introduction: Intro to stray light testing and normalized stray light | Outputs from Imatest stray light analysis | History
Background: Examples of stray light | Root Causes | Test overview | Test factors | Test Considerations | Glossary
Calculations: Metric image | Normalization methods | Light source mask methods | Summary Metrics | Analysis Channels | Saturation
Instructions: High-level Imatest analysis instructions (Master and IT) | Computing normalized stray light with Imatest | Motorized Gimbal instructions
Settings: Settings list and INI keys/values | Standards and Recommendations | Configuration file input
Page Contents
This page provides a high-level overview of a stray light test.
Test Overview
Equipment
- A black room (darker and larger are better for improved test hygiene)
- A small light source
- Camera mounting equipment
- Rotation equipment (could be for either the light source or the camera)
- Light-level measurement equipment
- (Optional) optics to adjust the optical properties of the light source
- This may include neutral density filters, collimating optics, diffusing filters, etc.
- (Optional) alignment equipment
- (Optional) baffling
Setup
The basic stray light test setup uses a small bright light source in a black room. The camera (or light source) is mounted on a rotation stage to build up coverage. Optionally, baffling is placed between the light source and the camera.
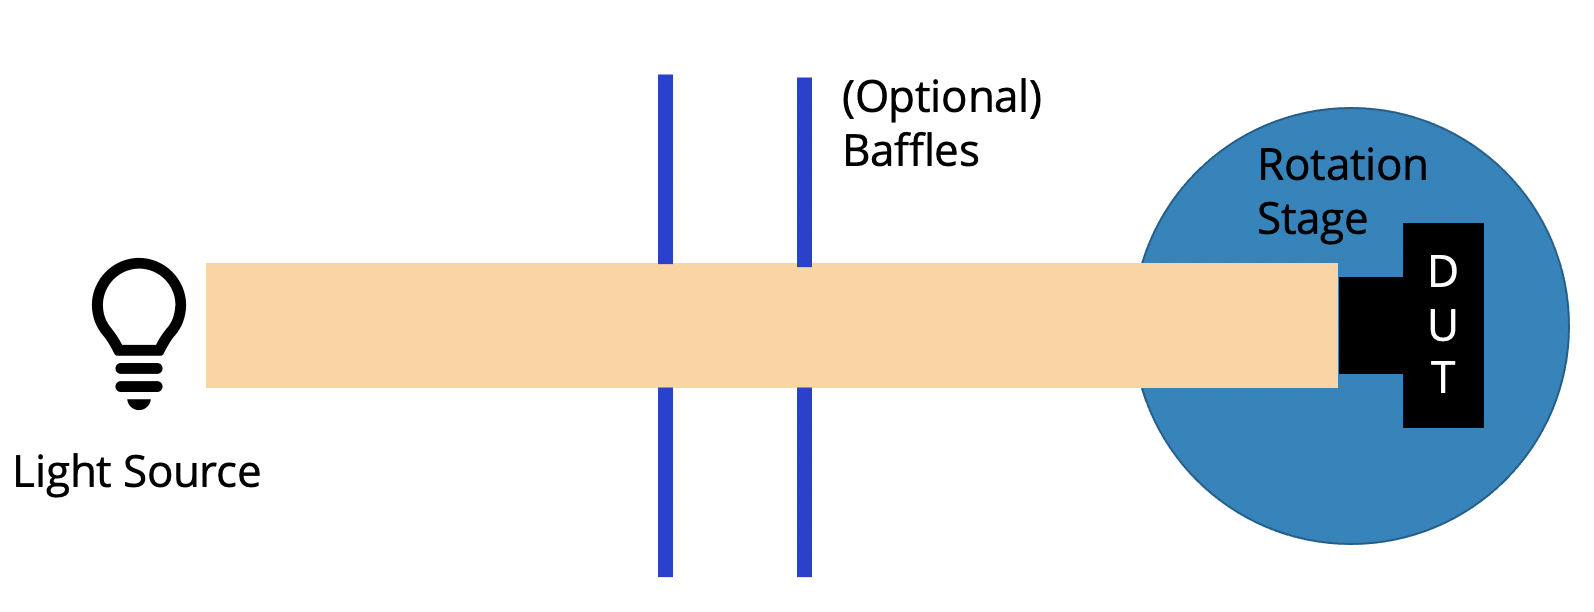
Sample schematic of a test setup
Test Methodology
Initial Setup
- Start with a dark (black room) — any source of light will be noise to this test
- Setup the light source and
- Align the light to the DUT fixturing
Test Preparation
- Determine the test plan needed for the camera
- Light source
- Level
- Spectra
- Rotation
- Field angle limits
- Field angle delta
- Azimuth angle limits
- Azimuth angle delta
- Normalization method and configuration
- Camera settings
- Mode(s)
- Gain state
- Integration time
- Light source
- Integrate capture into the sample script
- Adjust the parameters of the sample script
Test Execution
- Setup for collection of the normalization data
- Collect the normalization data
- Setup for collection of the analysis data
- Collect the analysis data (this is done by running a capture script)
- Perform the analysis
Analysis
- Compute the normalization factor
- For each analysis image
- Identify if the direct image of the light source is present in the image
- If the light source is in the image, produce a mask of the direct image of the light source
- Compute the stray light metric image
- Compute any summary metrics
- Compute any meta-analysis (e.g., plots over field angle)
Understanding the Test
Thought Experiment
Assume you have an infinitely large, infinitely black room.
Question 1: If you take a picture in this room, what do you expect?
Question 2: If you take a picture with a small, bright light source what do you expect?
Question 3: If the light source is out of the FOV, does you answer change?
Question 4: If I change the level (e.g., lux, radiance, etc.) of the light source, what do you expect?